Cake

Peach Buttermilk Cake by Molly Brodak

This terrible thing happened to my tree, which is where our story starts. My spindly but well-loved peach tree.

I planted this peach tree in our front yard myself. I nurtured it, fed it, checked on its growth and progress obsessively. I documented its budding, flowering, and fruiting. I selectively pruned away 60% of the green peaches to make sure the remaining fruit would be large and flavorful. I monitored their progress for months. 

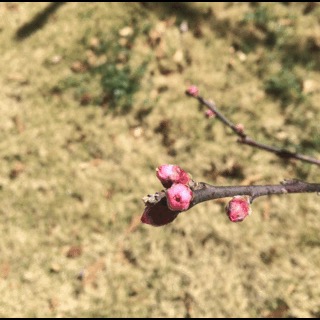
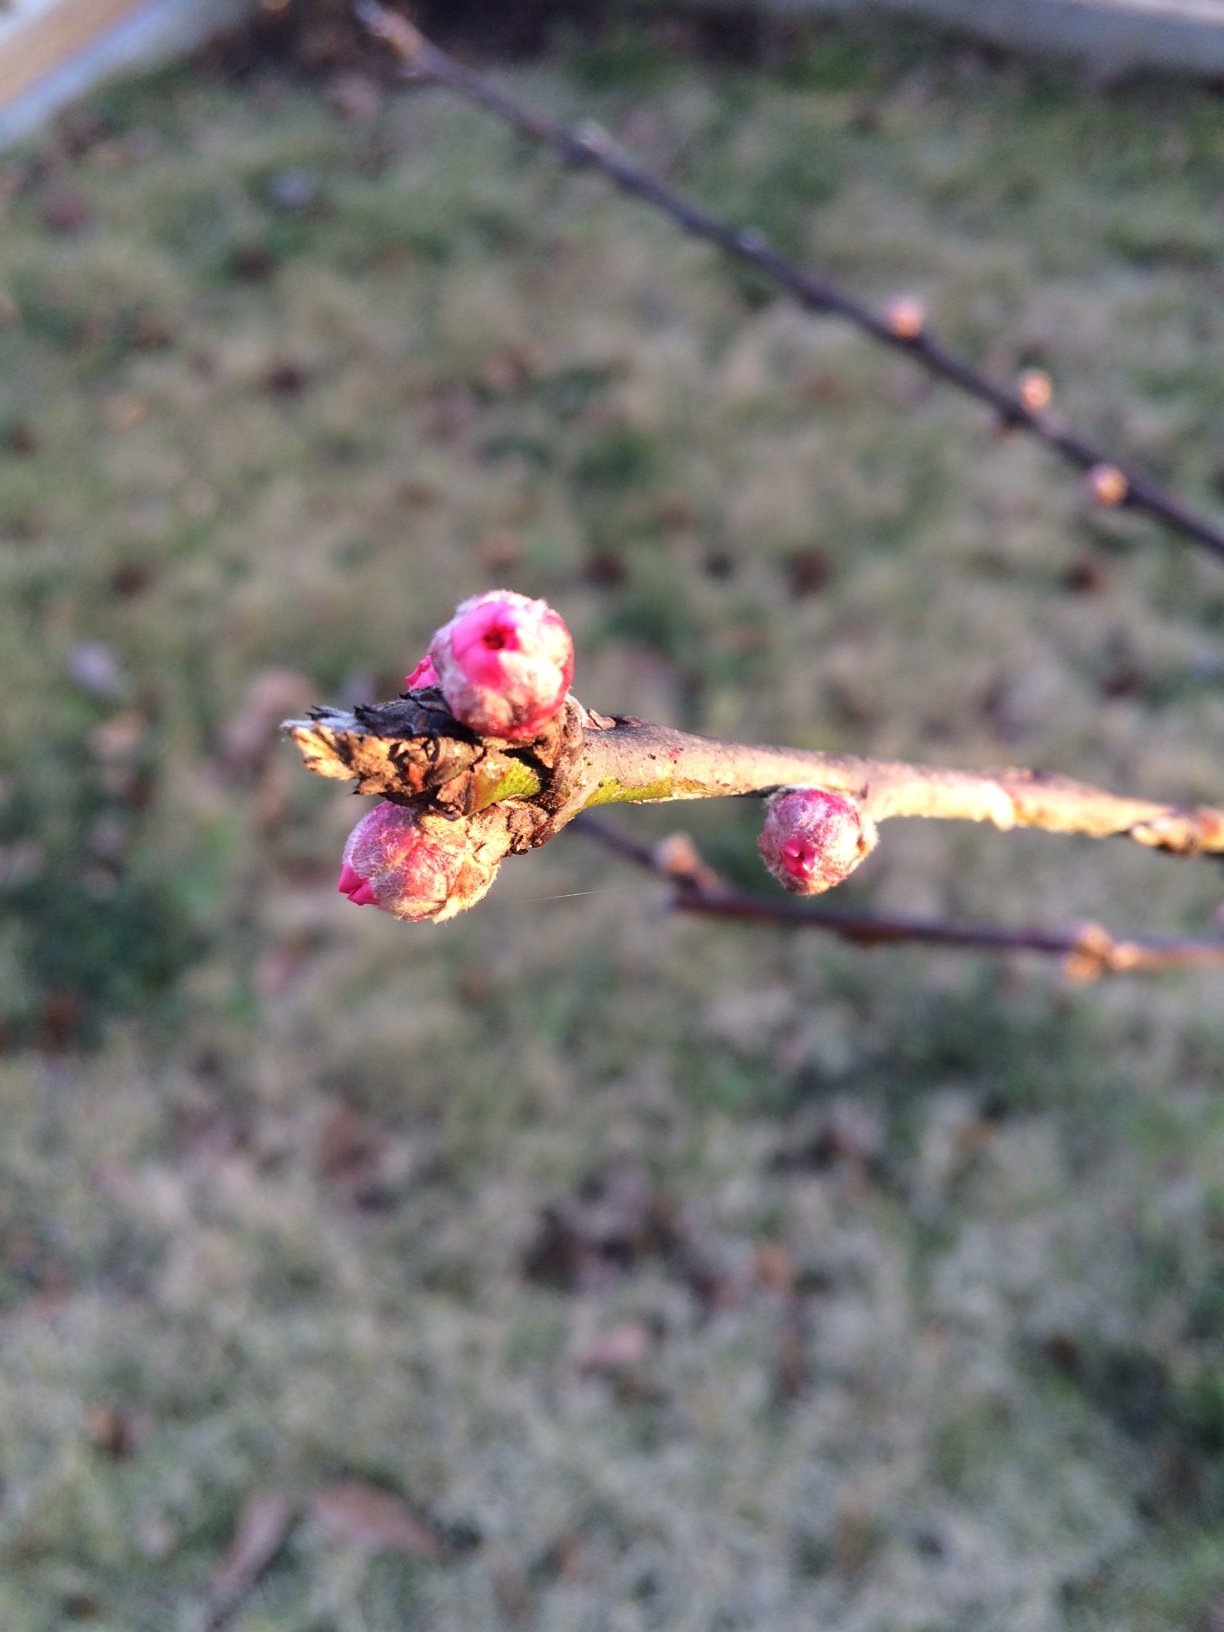
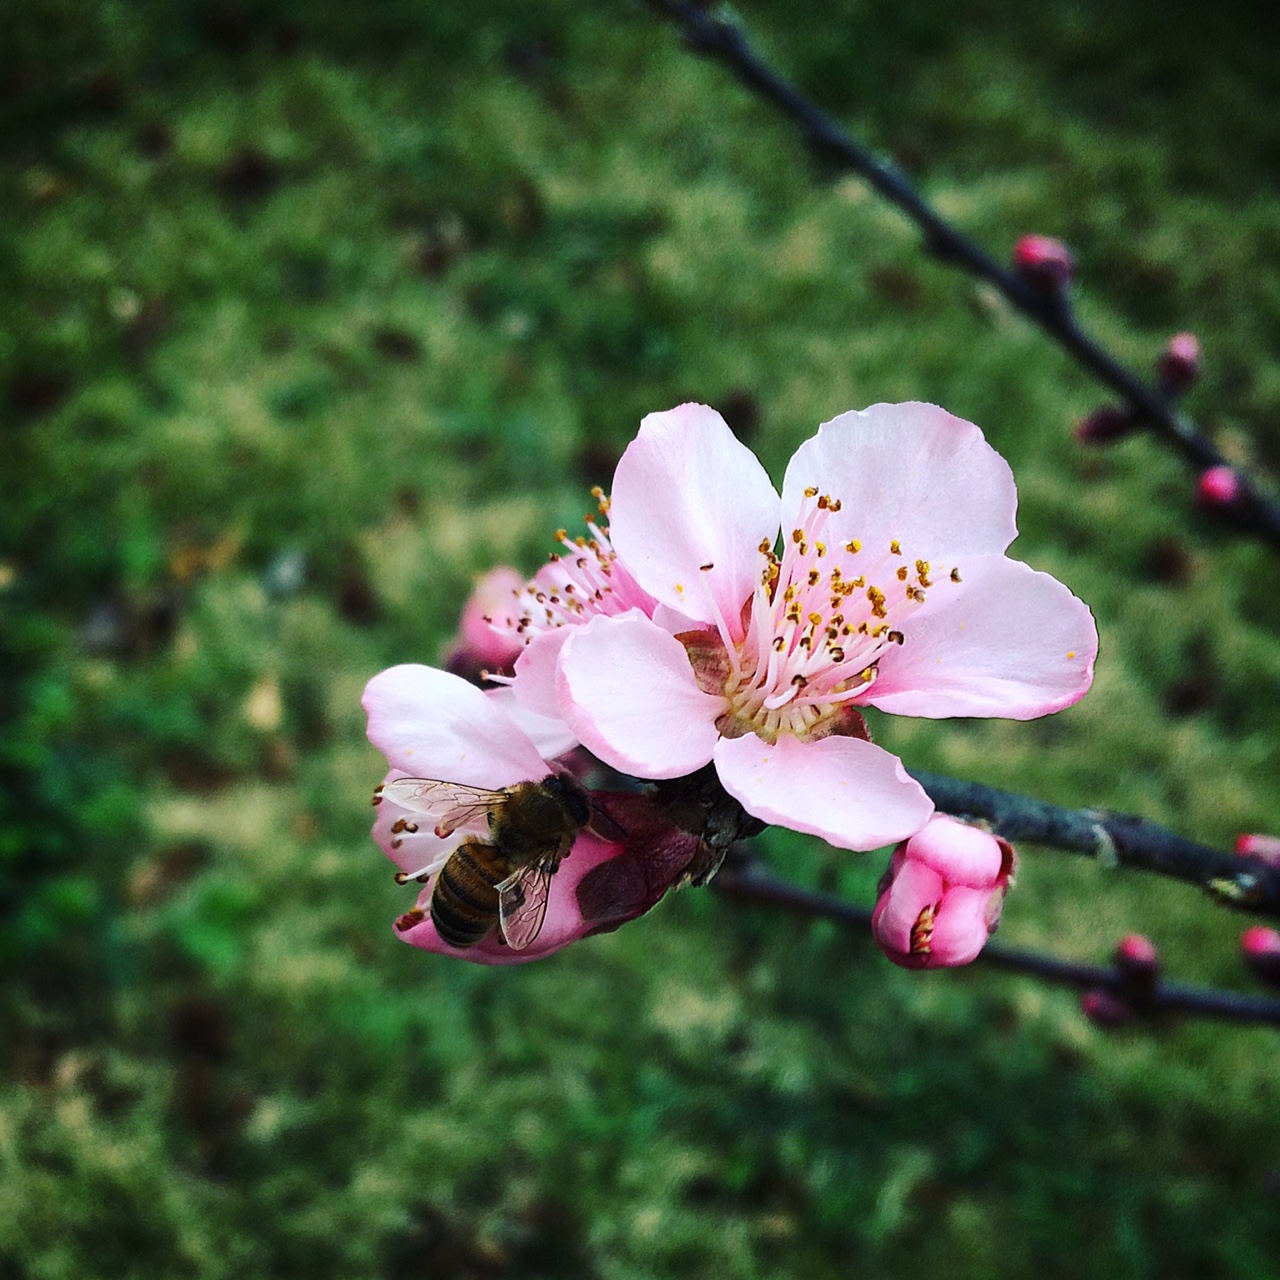
Phone photos evidence my mania.

Then, I found one underdeveloped little peach on the lawn, half-gnawed. I was enraged. Little nibbly bites meant squirrels.

I festooned the tree with yards and yards of bird netting and secured it. Just for good measure, I sprayed all of the now-protected peaches with hot pepper spray which is supposed to burn the devil out of any little sneaky rodent mouths.

I checked on my peaches almost every day

I checked on my peaches almost every day

The peaches kept disappearing. One morning, I found only three remained. More netting, more spray, and yes--I resorted to watching from the porch. 

Soon the netting stakes were uprooted and every last peach was gone. Every. Single. Peach. Eaten by squirrels.

I admit it--I cried. I had been delightfully counting my proverbial chickens before they proverbially hatched, planning all the wonderful things I would make with those peaches. I started to plan my defenses for next year, which, I assure you, will be no mere cosmetic application of nets and staking. I'm going to build a goddamn fortress around this tree. And I will have homegrown Georgia peaches--next year.

Fortunately for me, LOTS of good people in Georgia grow fantastic peaches mere miles from my doorstep, so acquiring local peaches was no epic task.

Thank you Pearson Farm

Thank you Pearson Farm

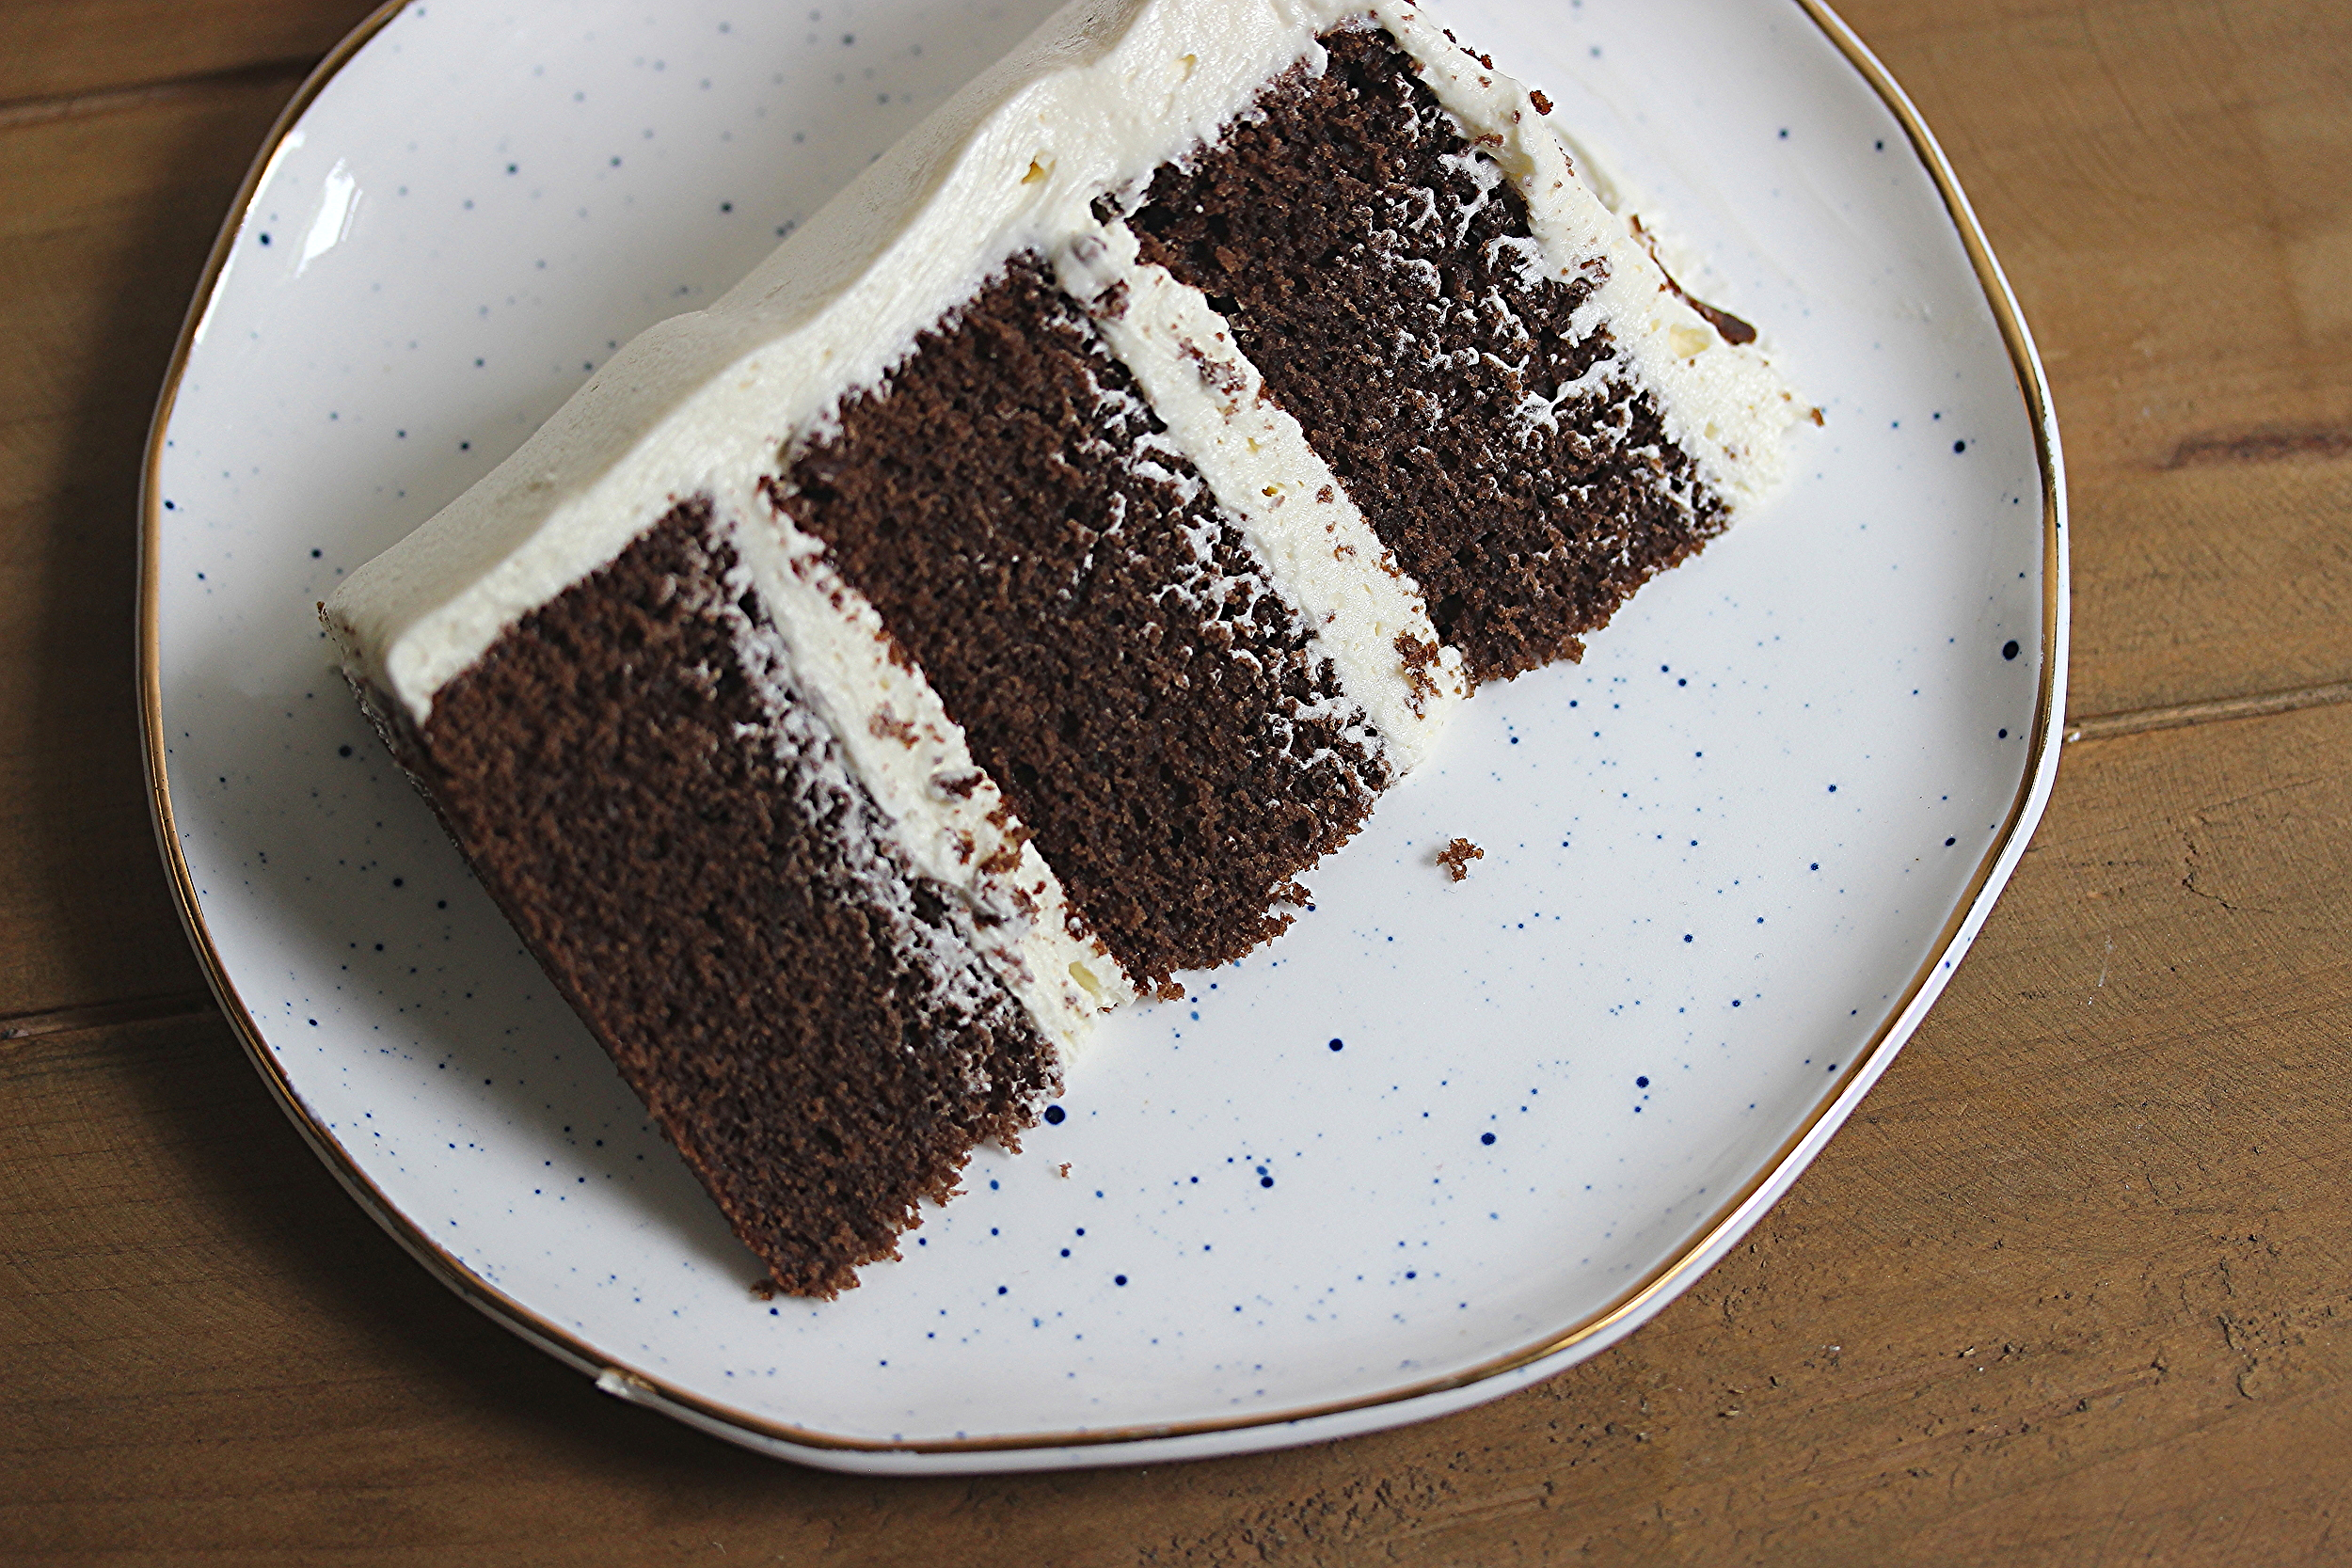
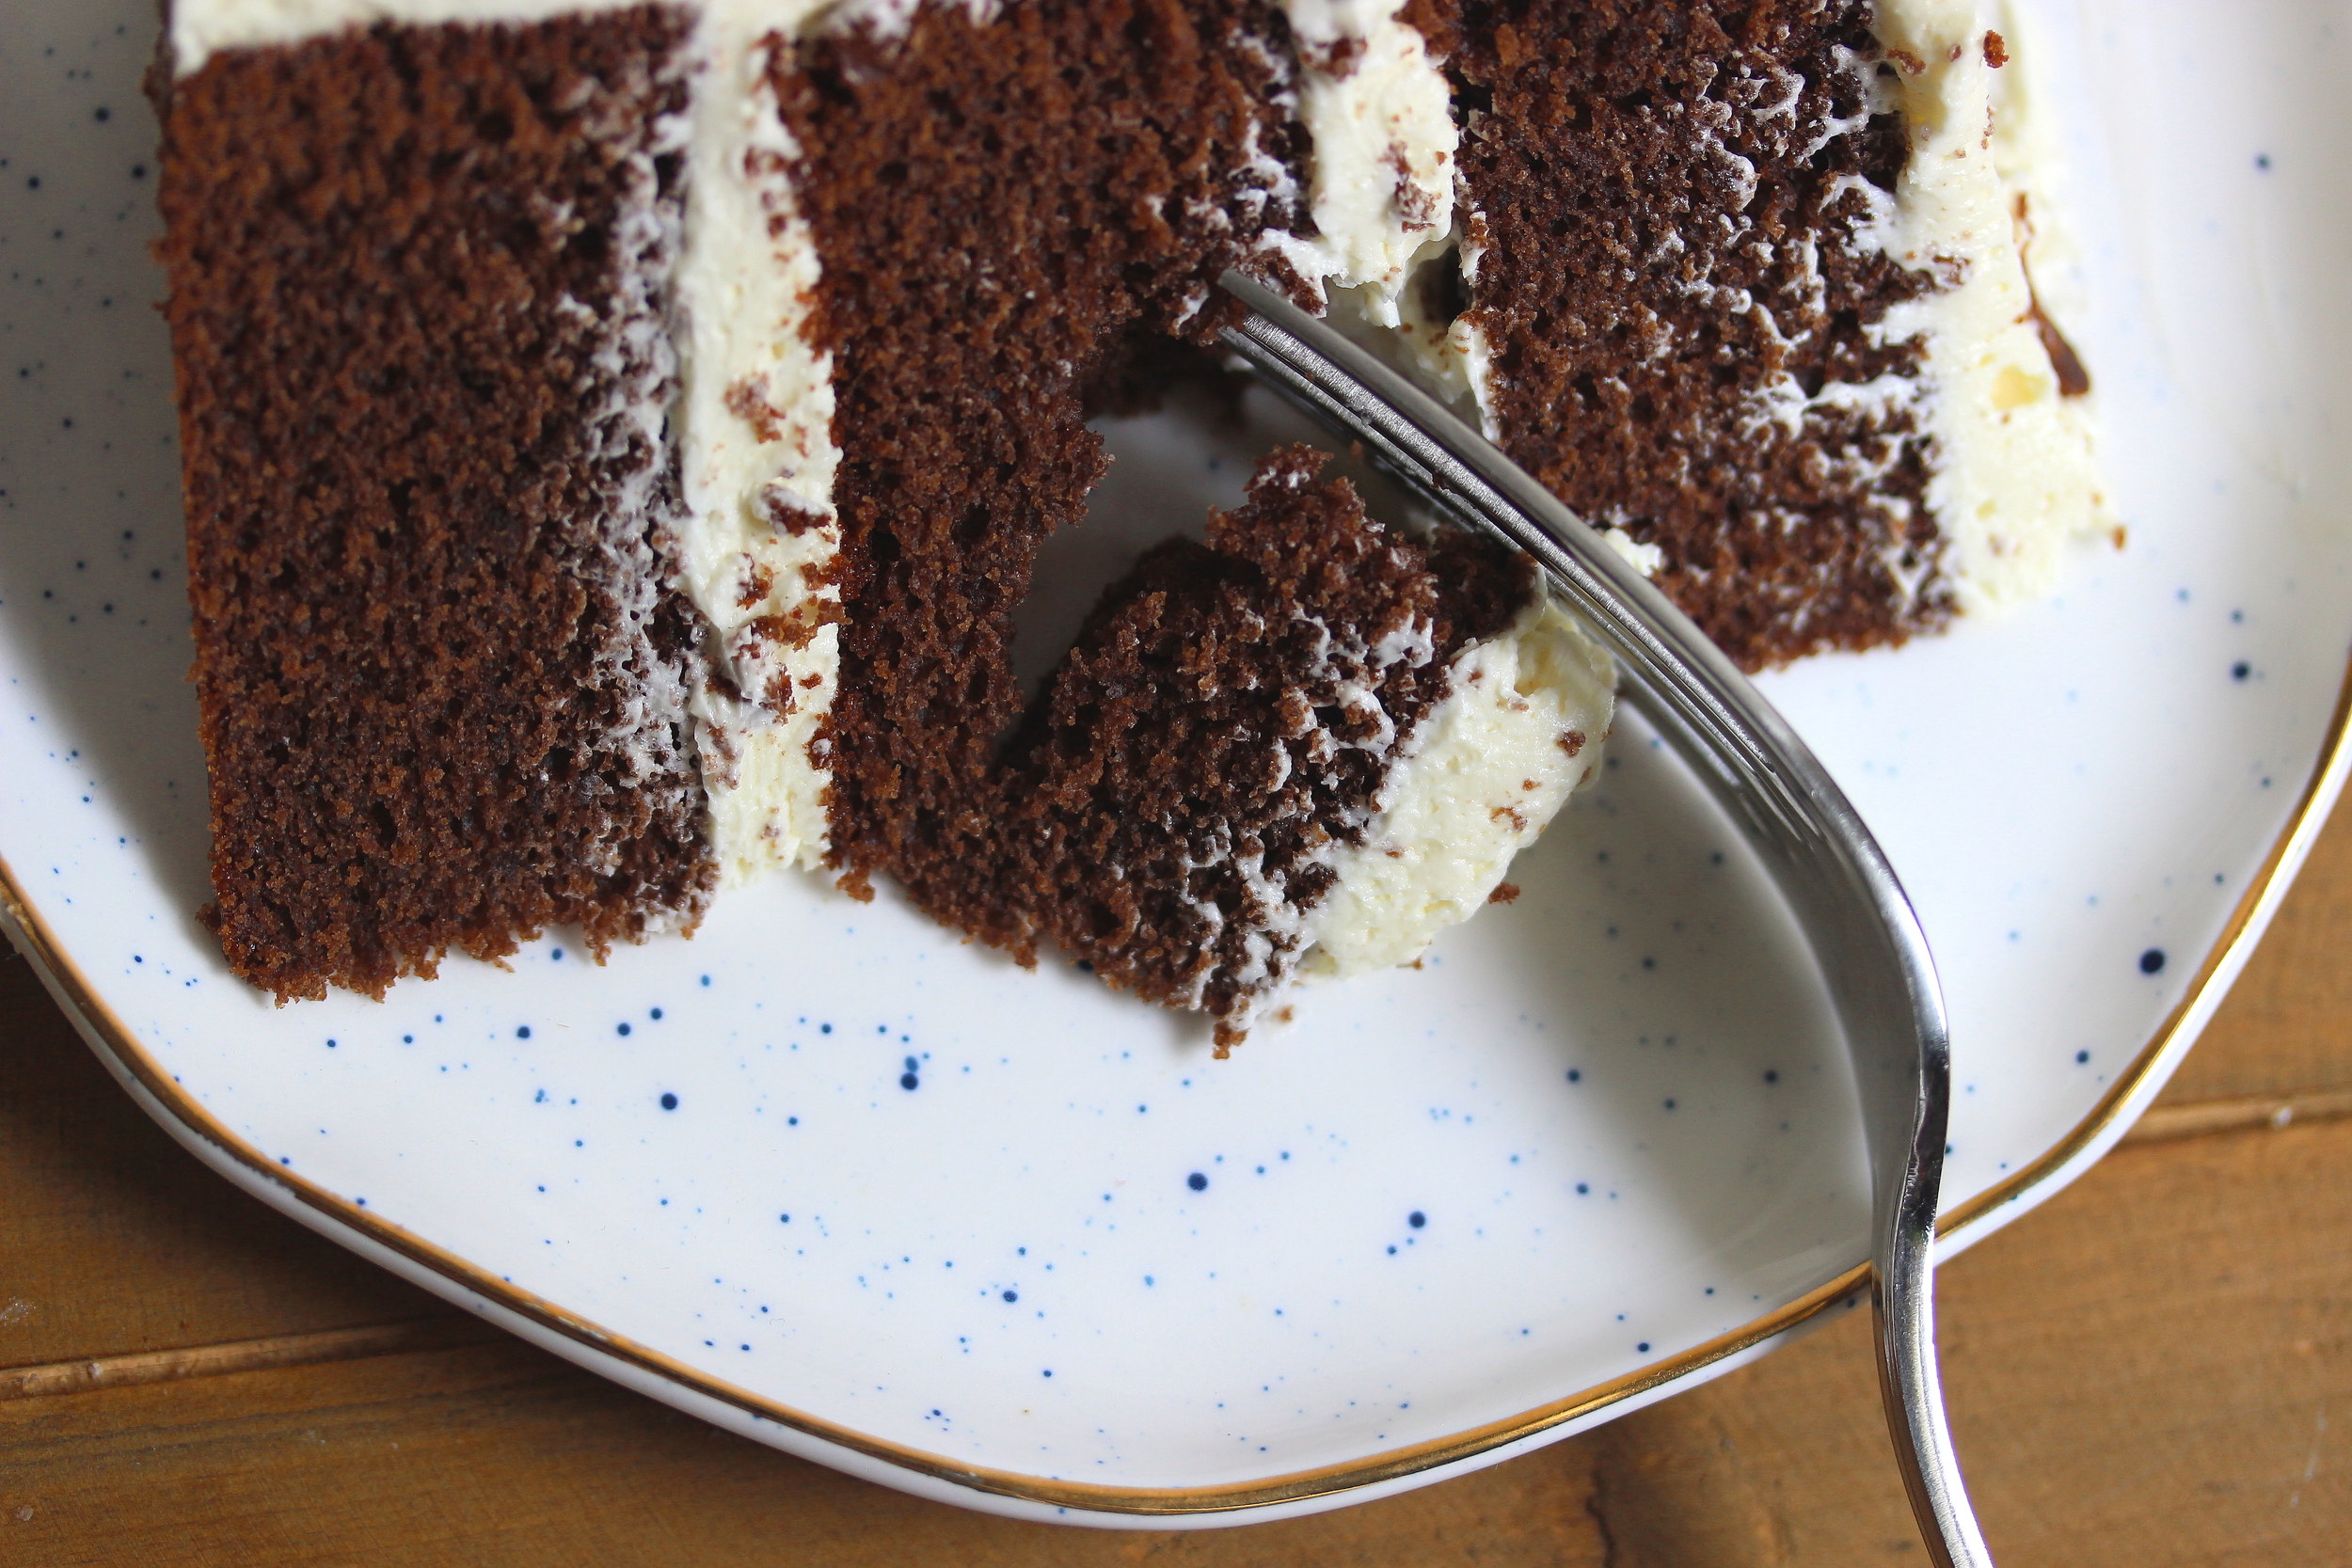
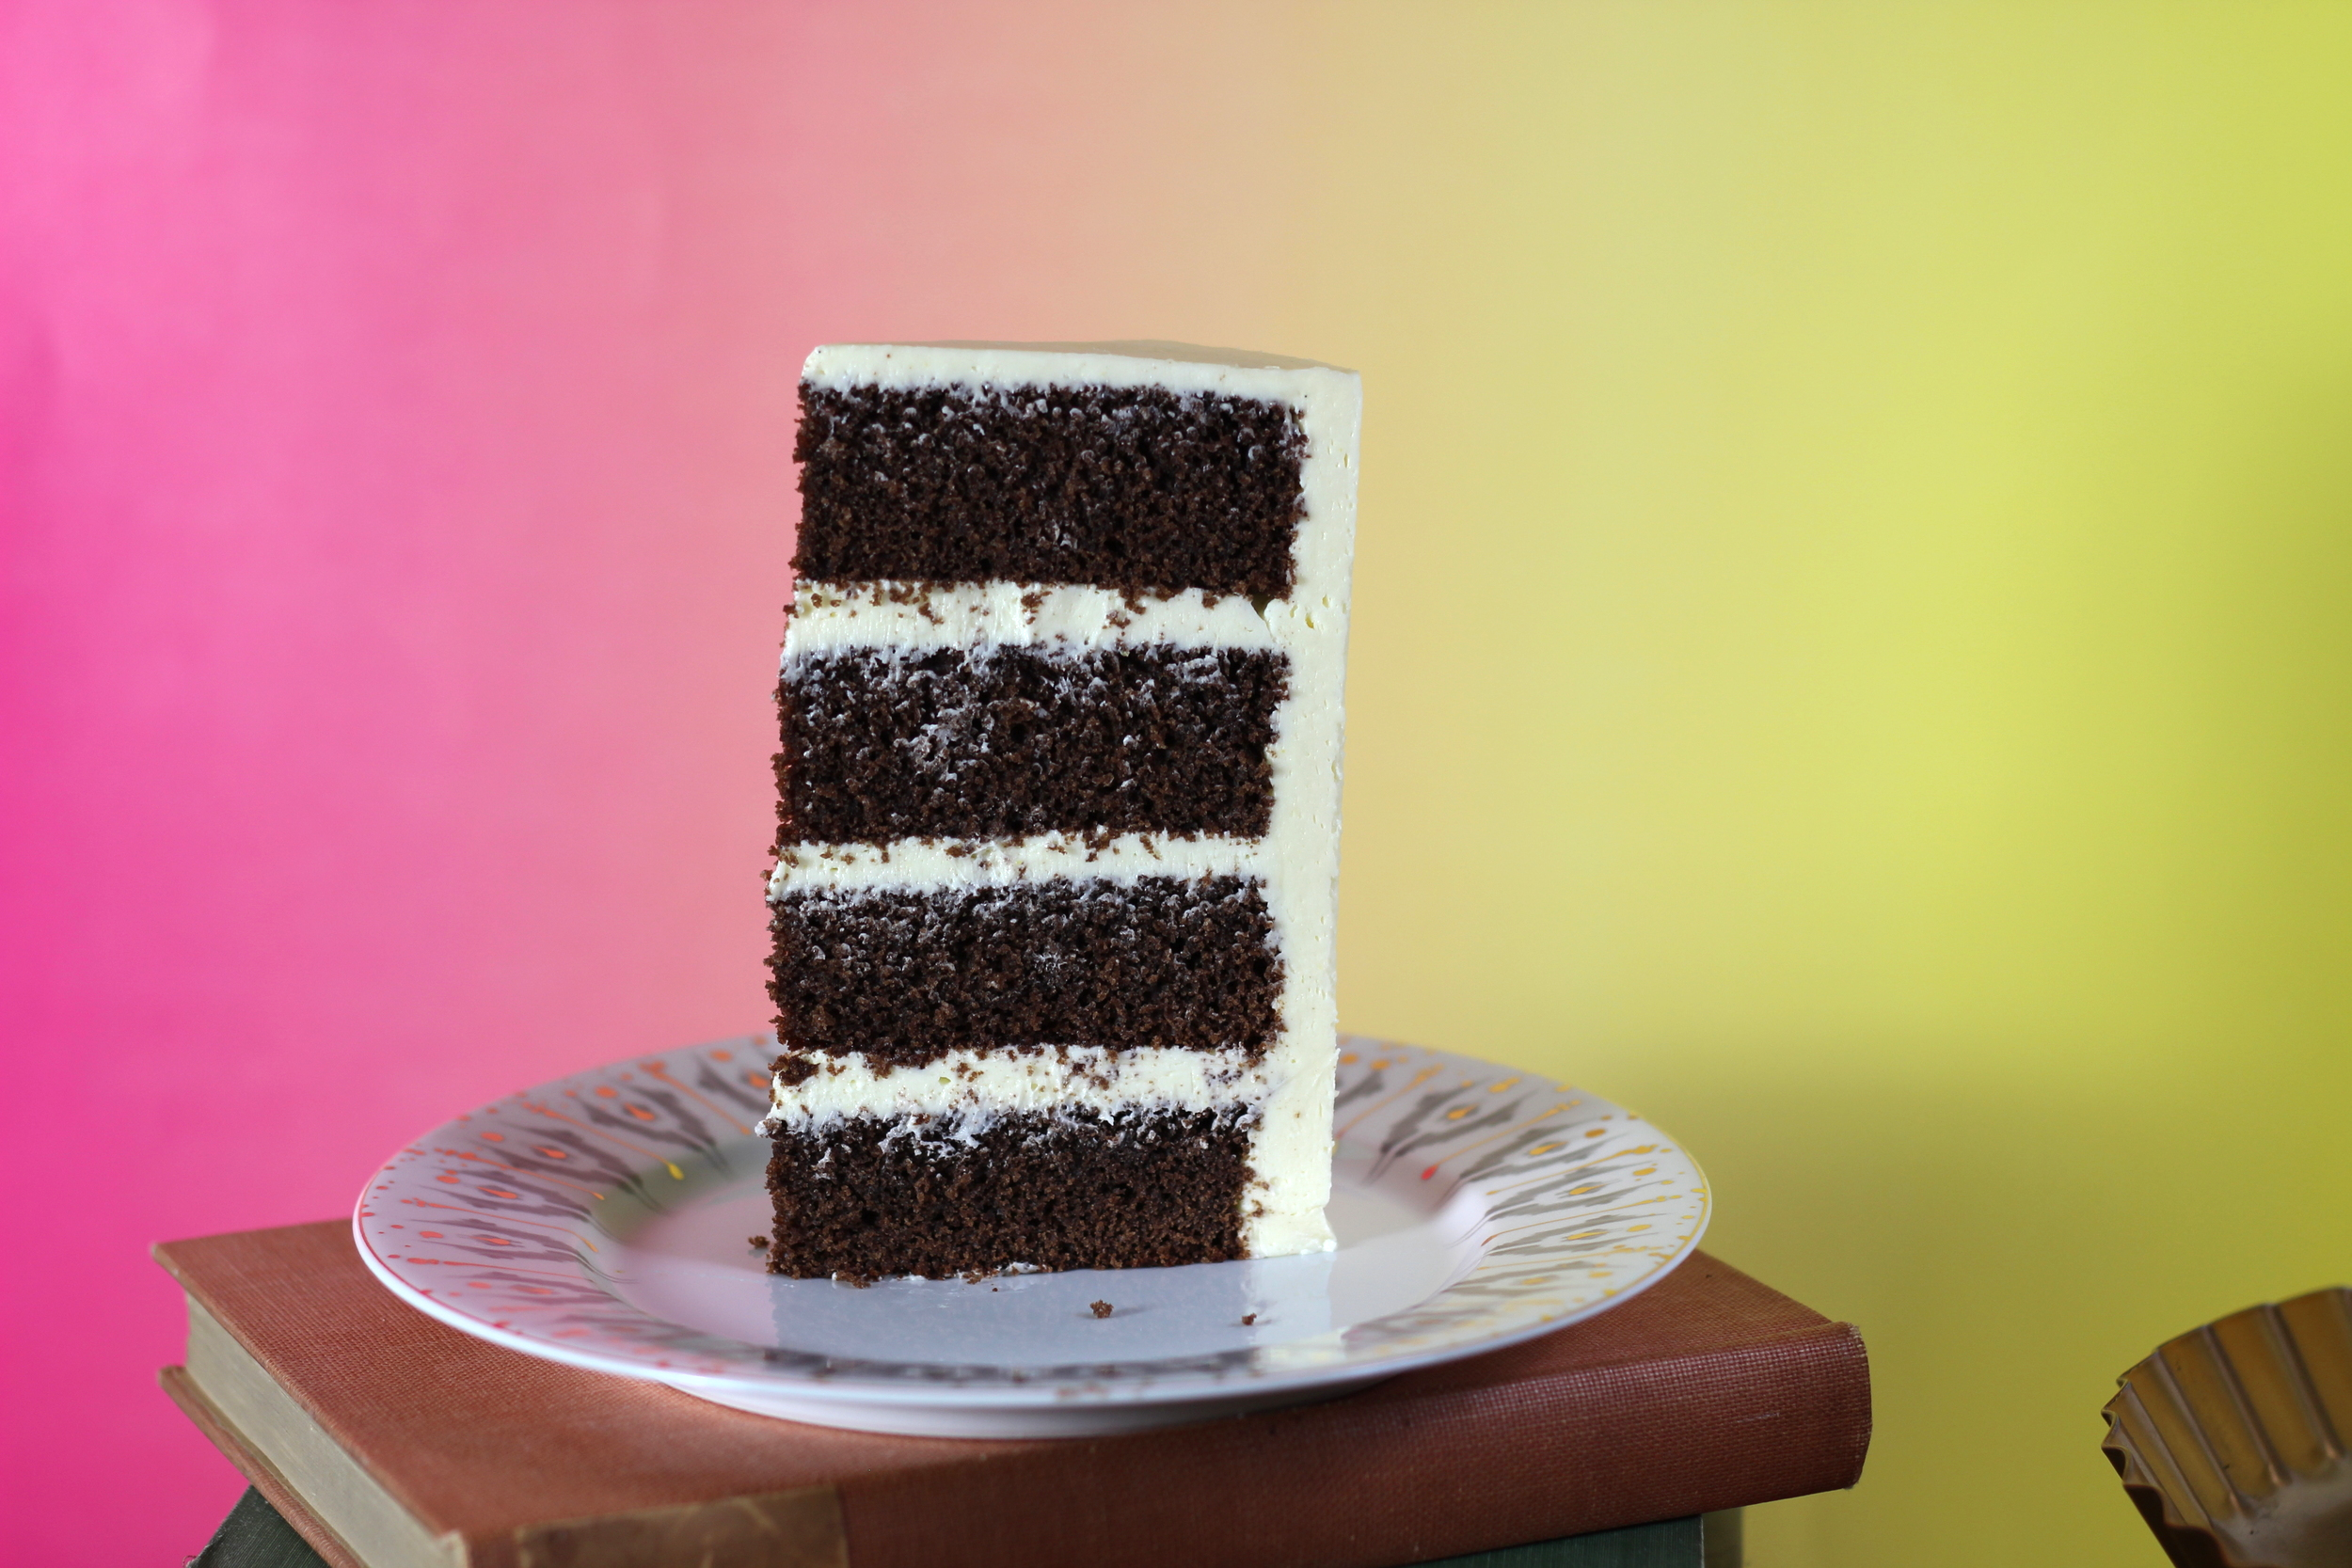
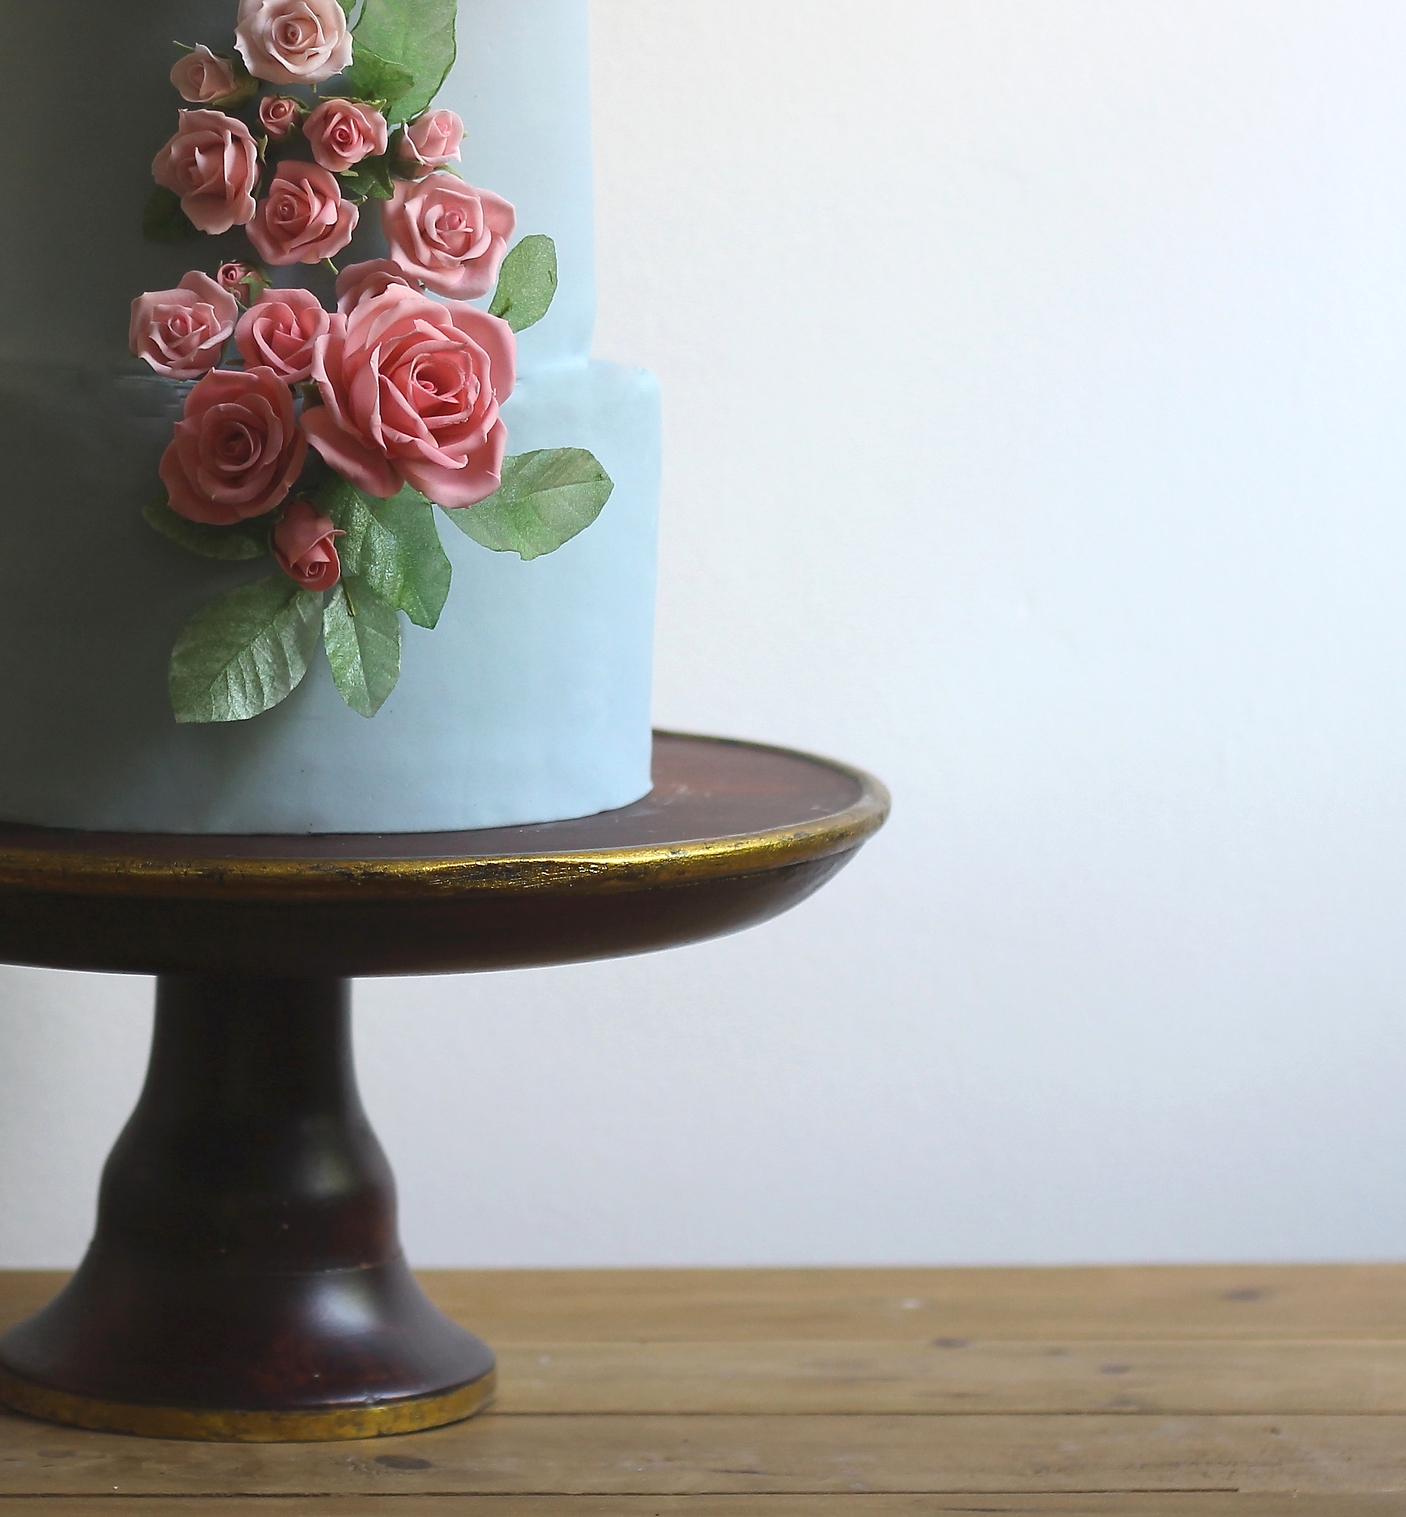
This is one of the things I would have made with my peaches. Turns out, peaches from just down the road are just as tasty in this buttermilk cake.

Although many cake recipes use a touch of buttermilk as a tenderizer, this cake has a wonderfully pronounced buttermilk flavor because it simply has more. It tastes so buttermilky it reminds me of biscuits! So it pairs well with the sweet and fragrant flavor of fresh peaches. Often I will cook down a fruit I plan to incorporate into a cake batter (like strawberries, for example) to remove some of the water from the fruit and intensify its flavor, but I knew cooking these peaches would have destroyed their fresh taste and was also unnecessary, since they are already very intensely flavorful. 

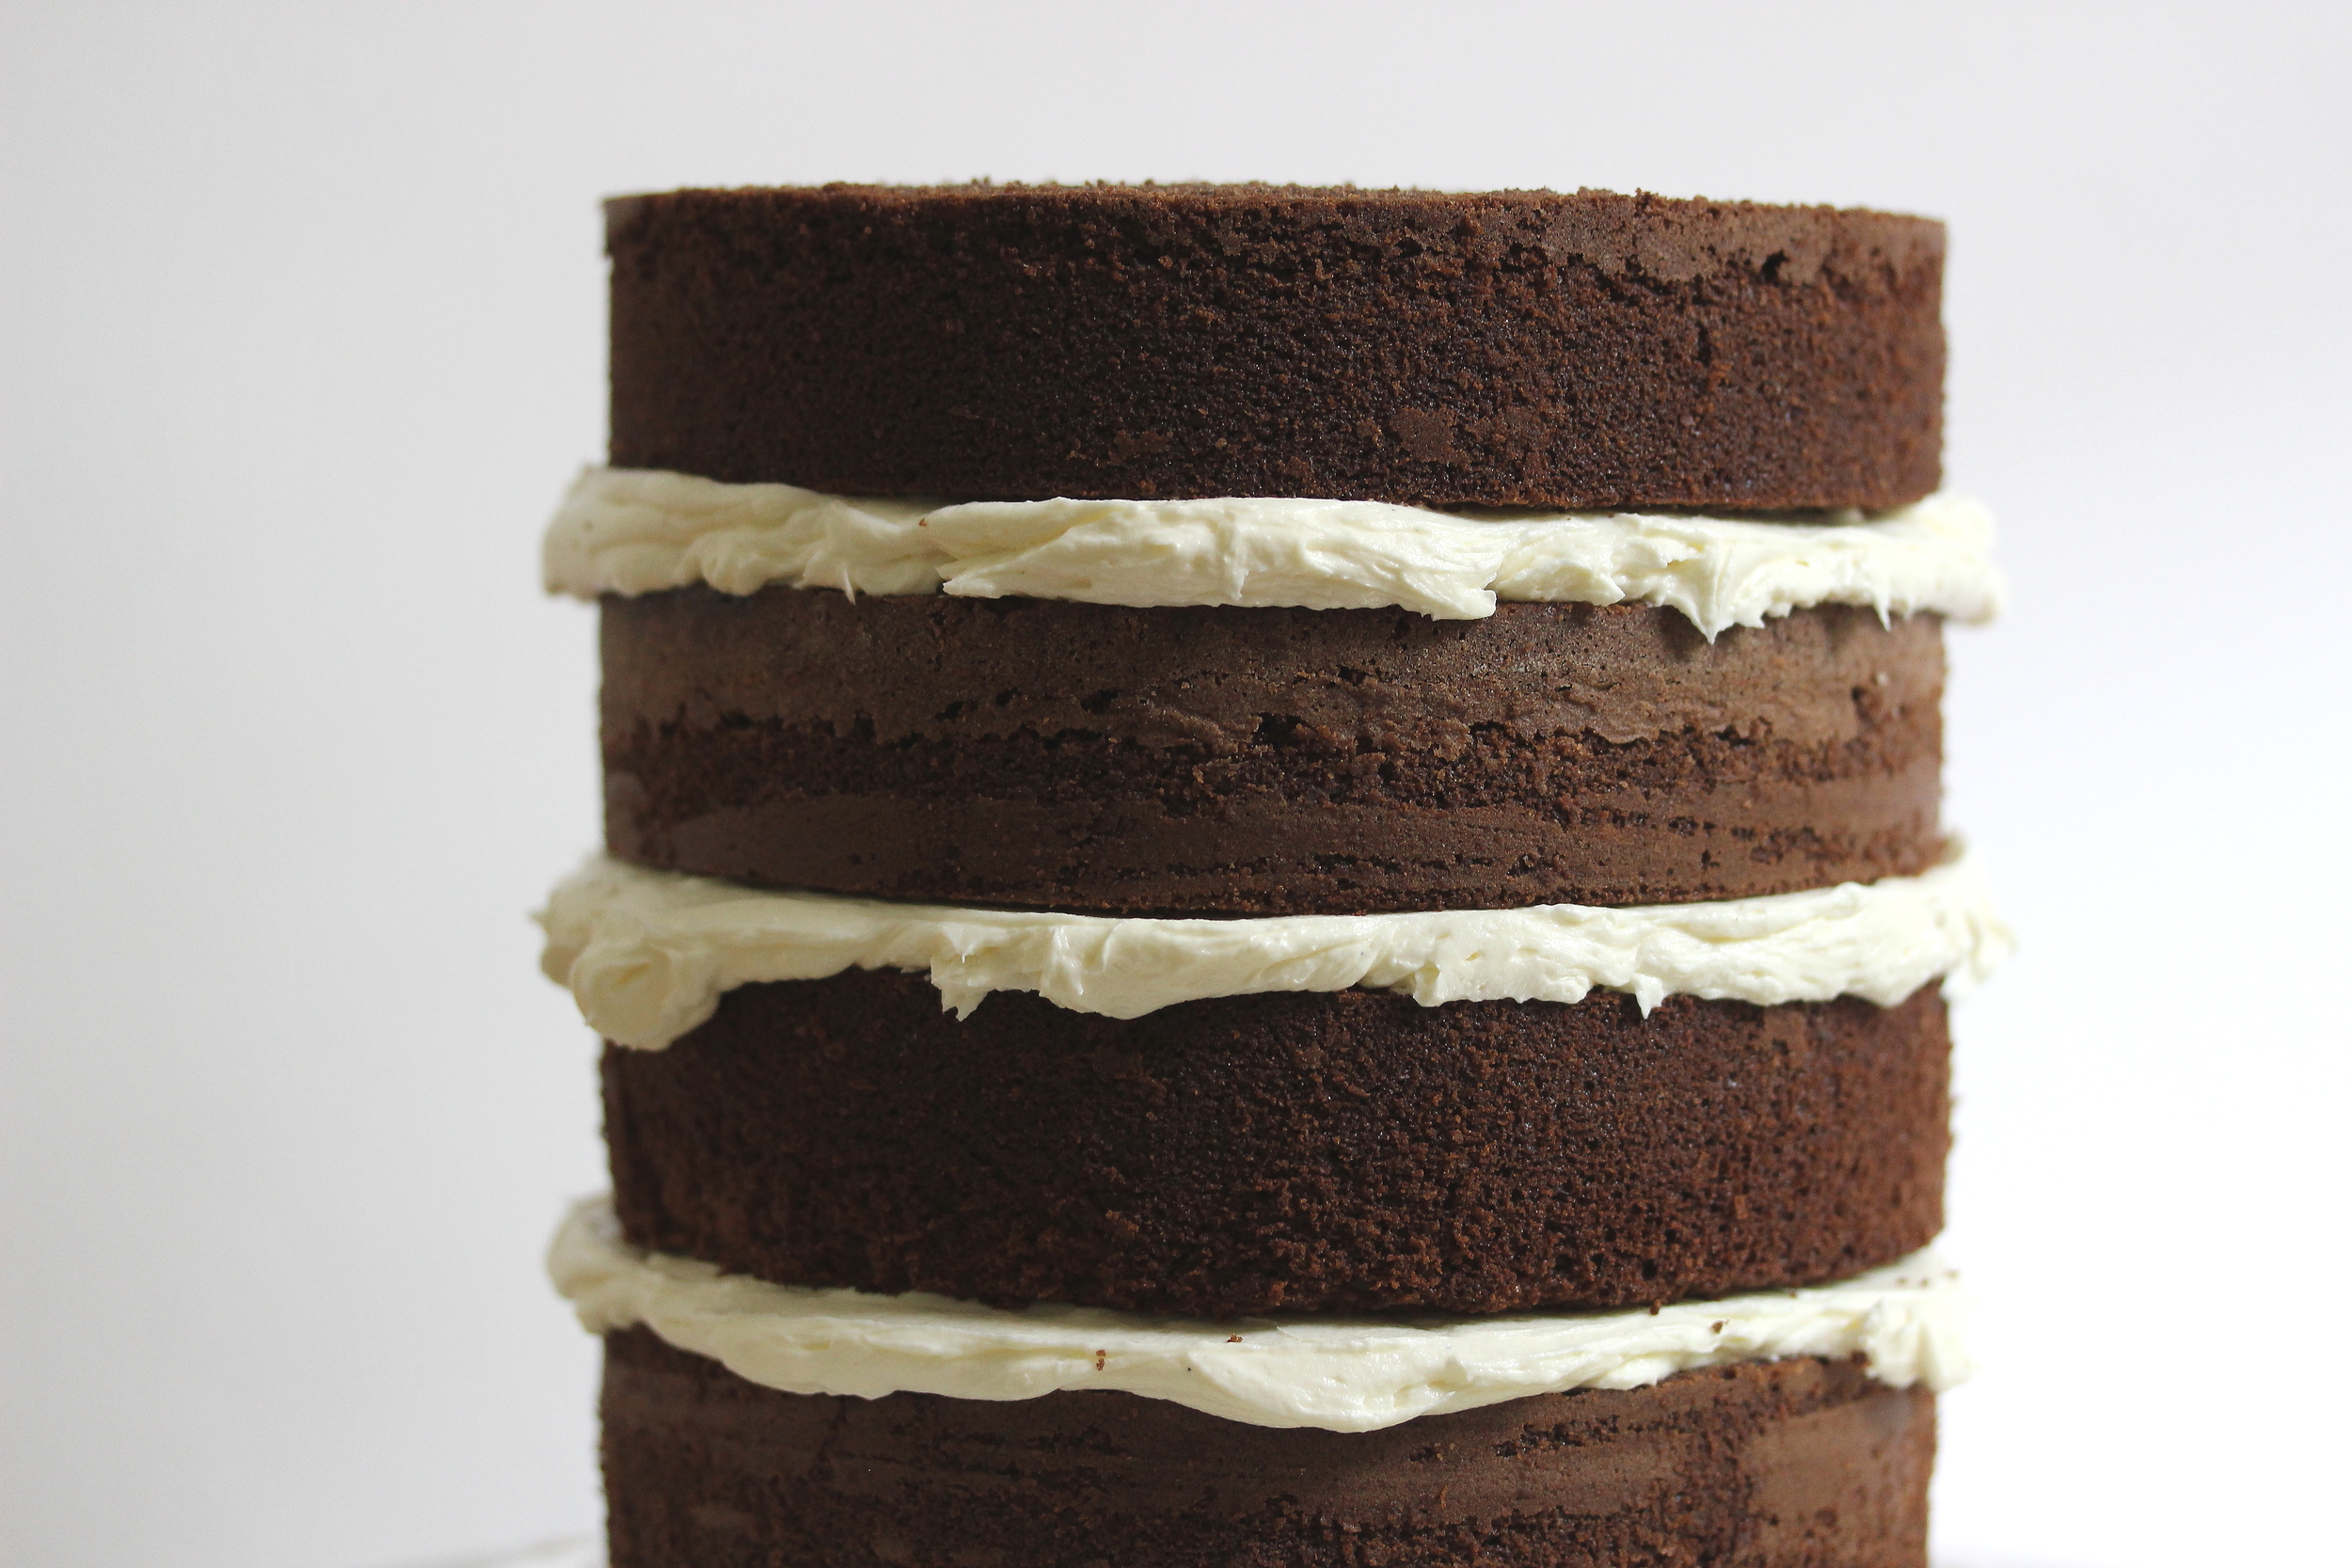
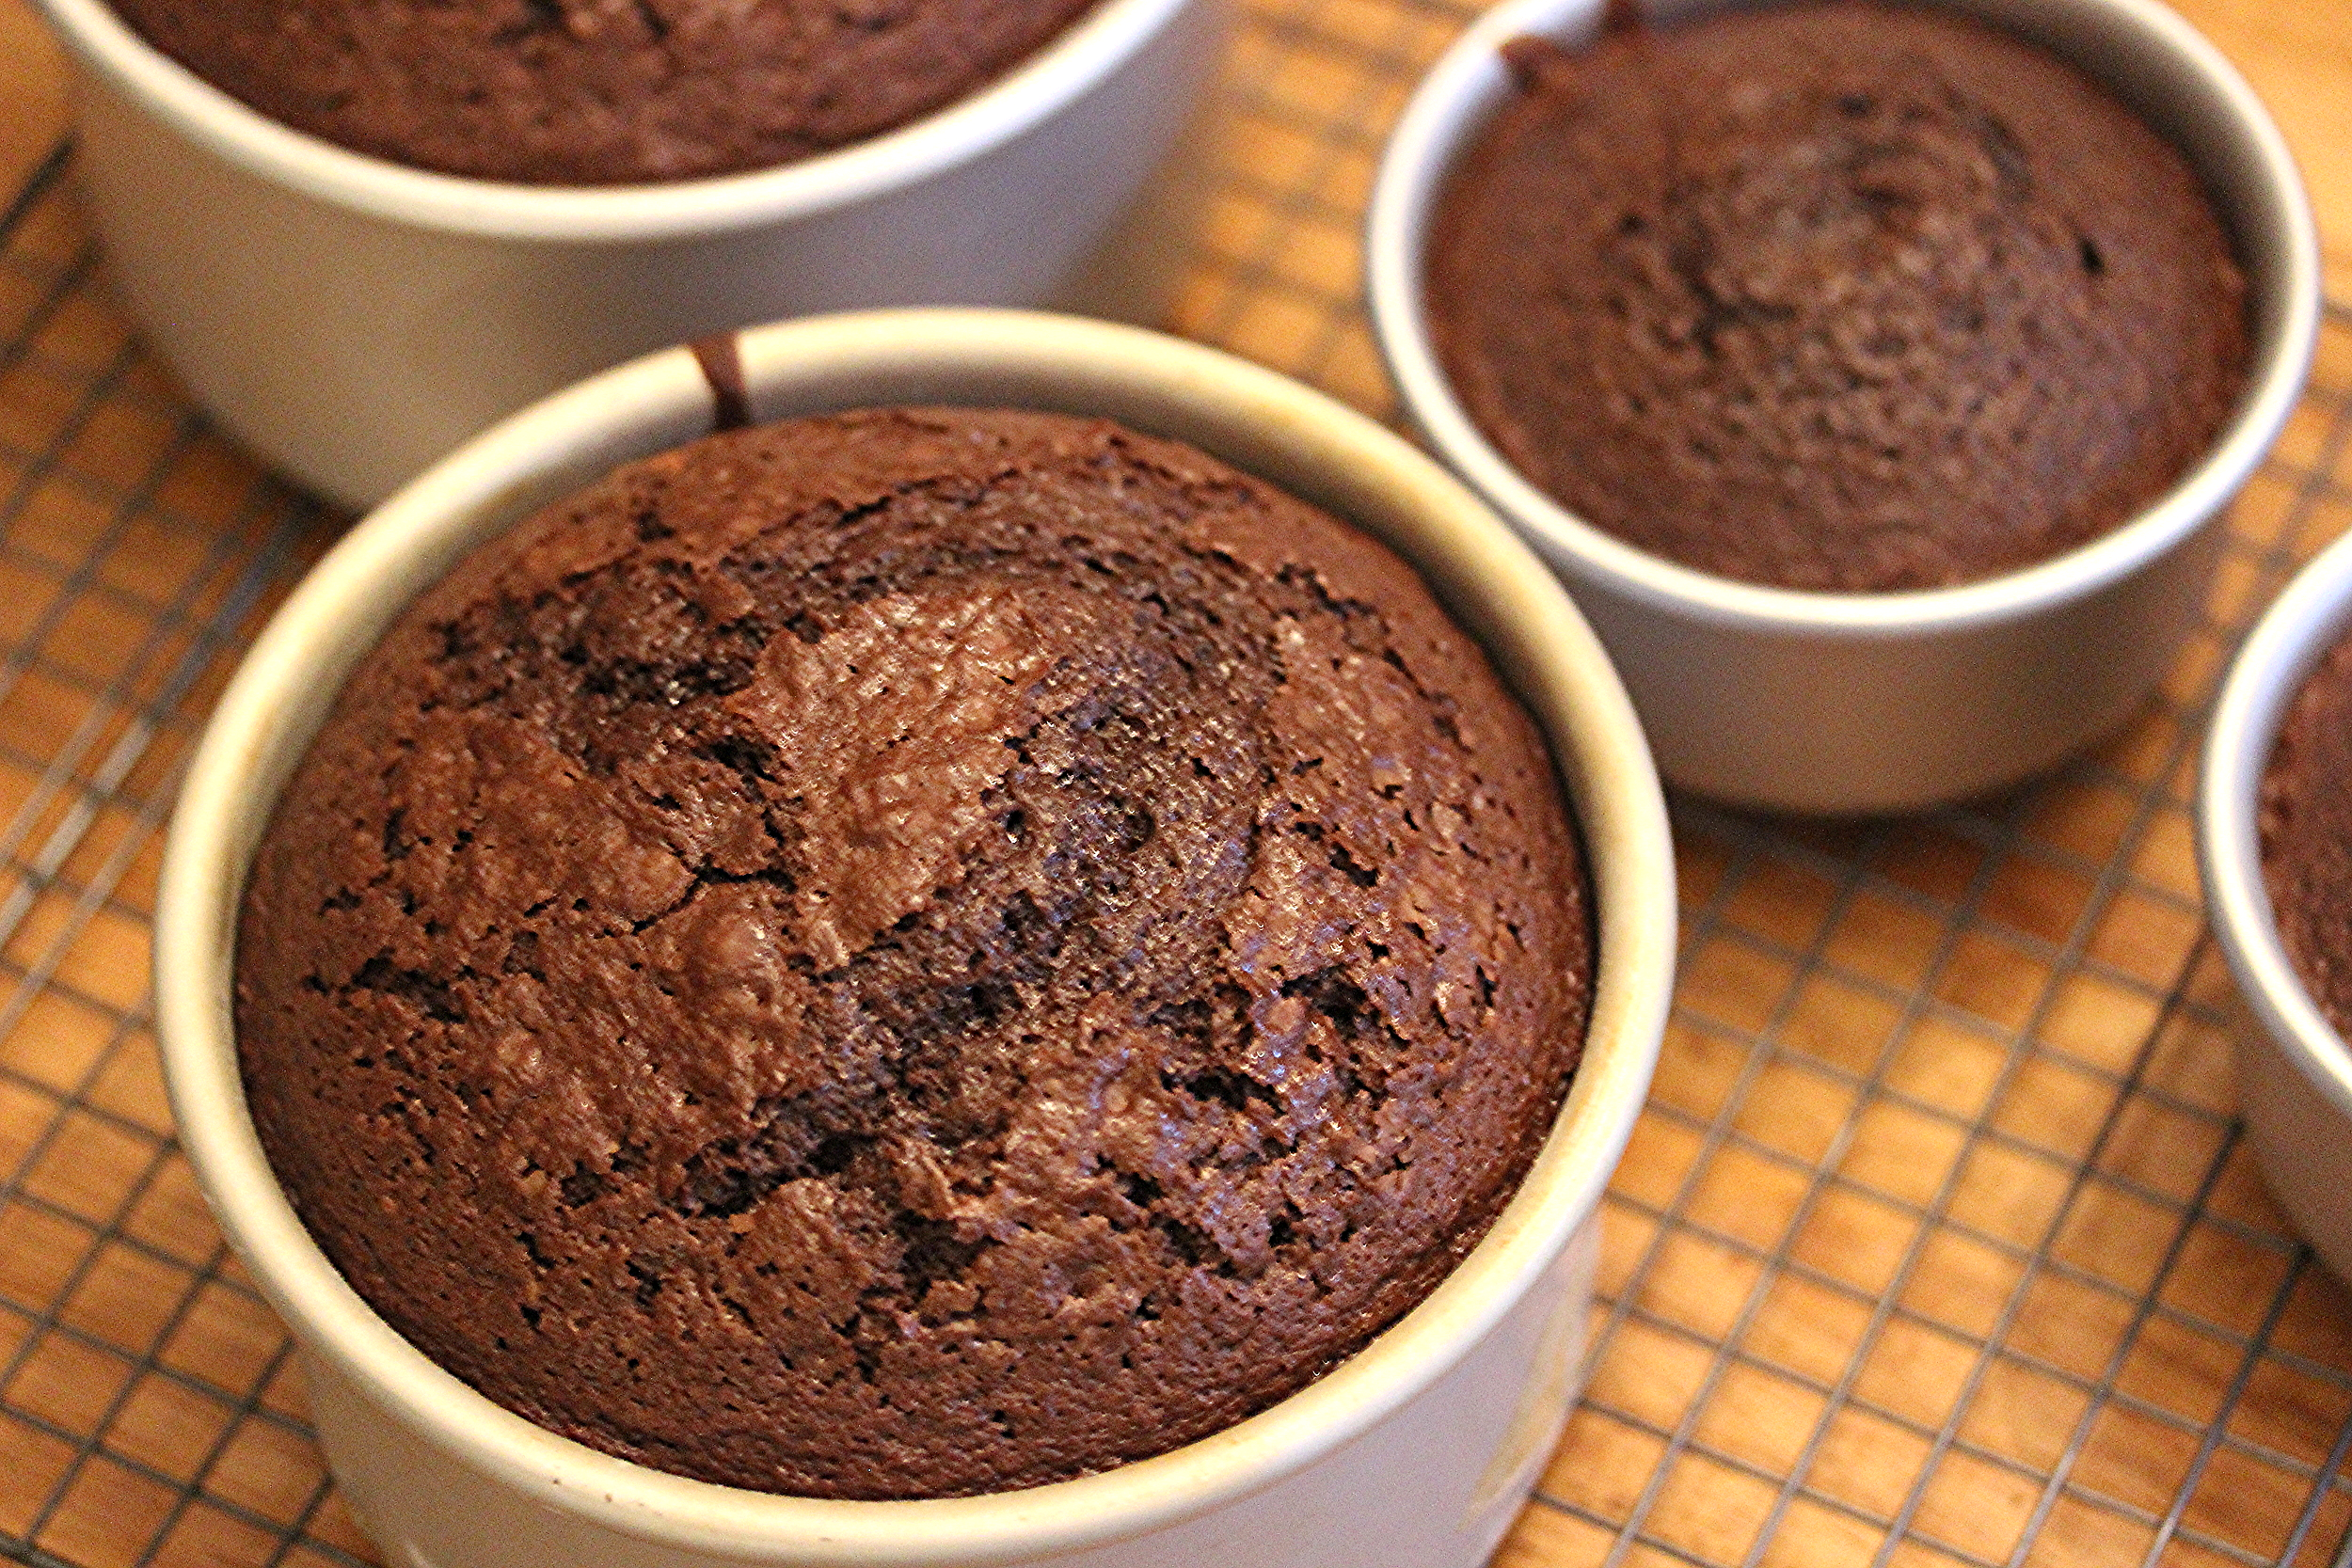
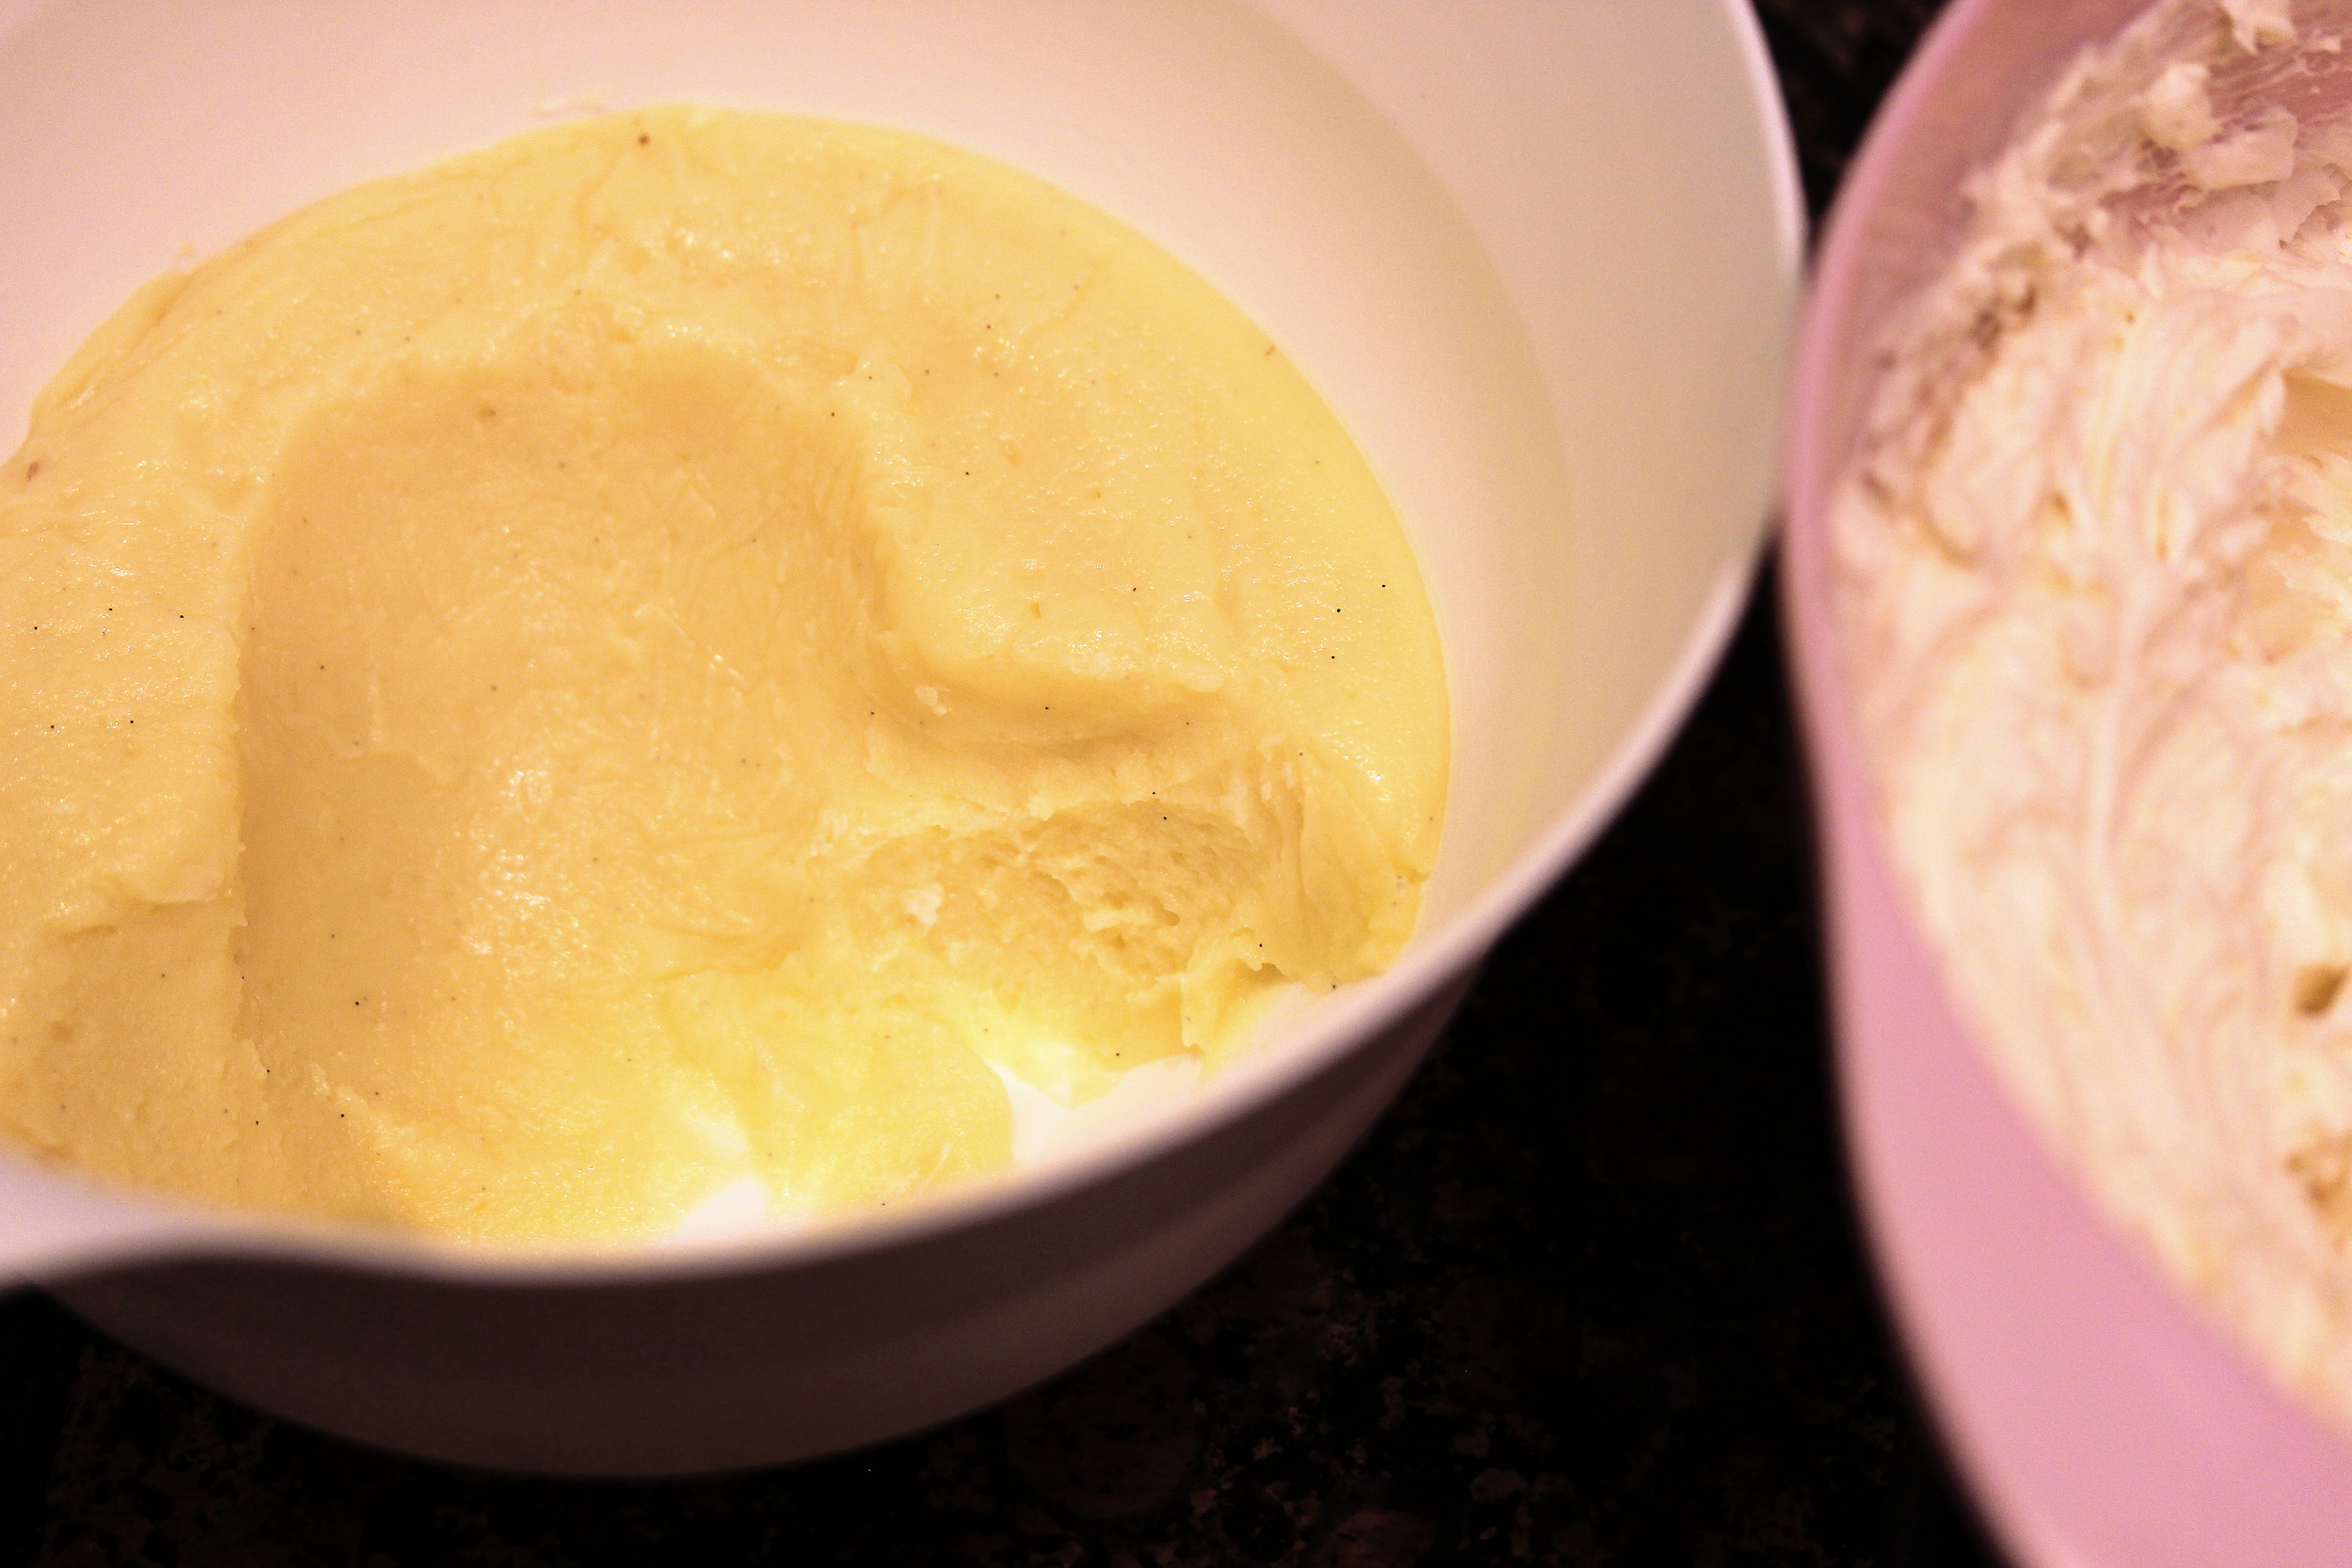
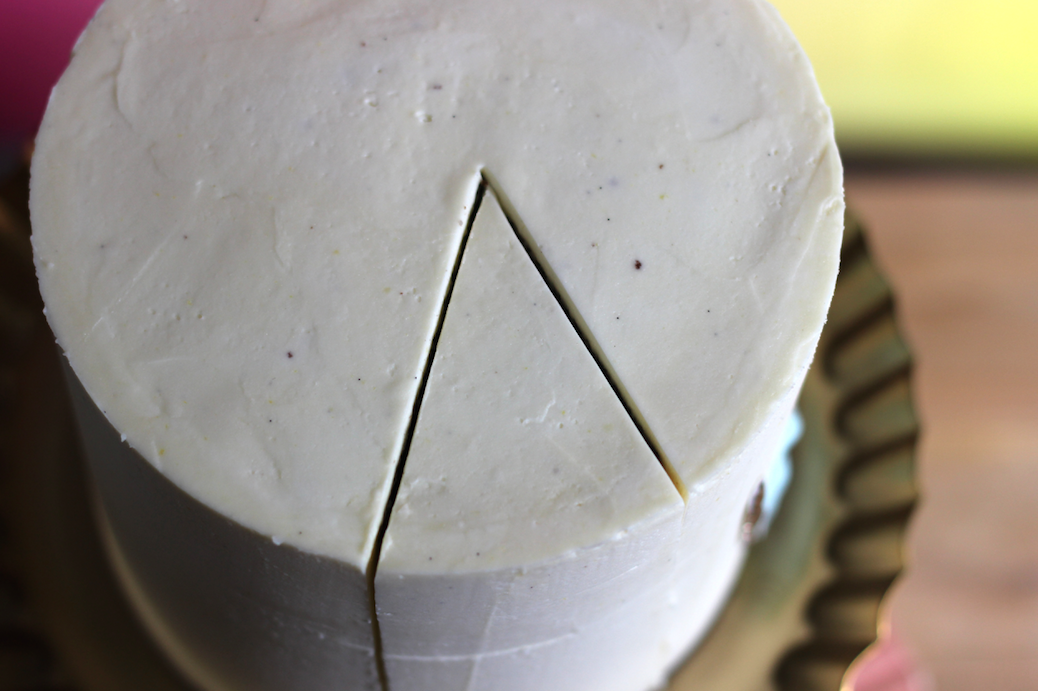
There is a lot of liquid in this cake, so a 50/50 mix of cake flour (I always use White Lily) and all-purpose flour will help keep the cake's structure intact. I recommend cooking this cake fully and allowing it to cool completely in the pan, as it is a delicate cake and can't take rough or rushed handling. A small amount of cornstarch in the batter helps to keep inclusions (like peach chunks) from sinking to the bottom of the pan while the cakes rise. Still, some will fall to the bottom--if you chop your peaches finely there is less of a chance they will all settle downward.

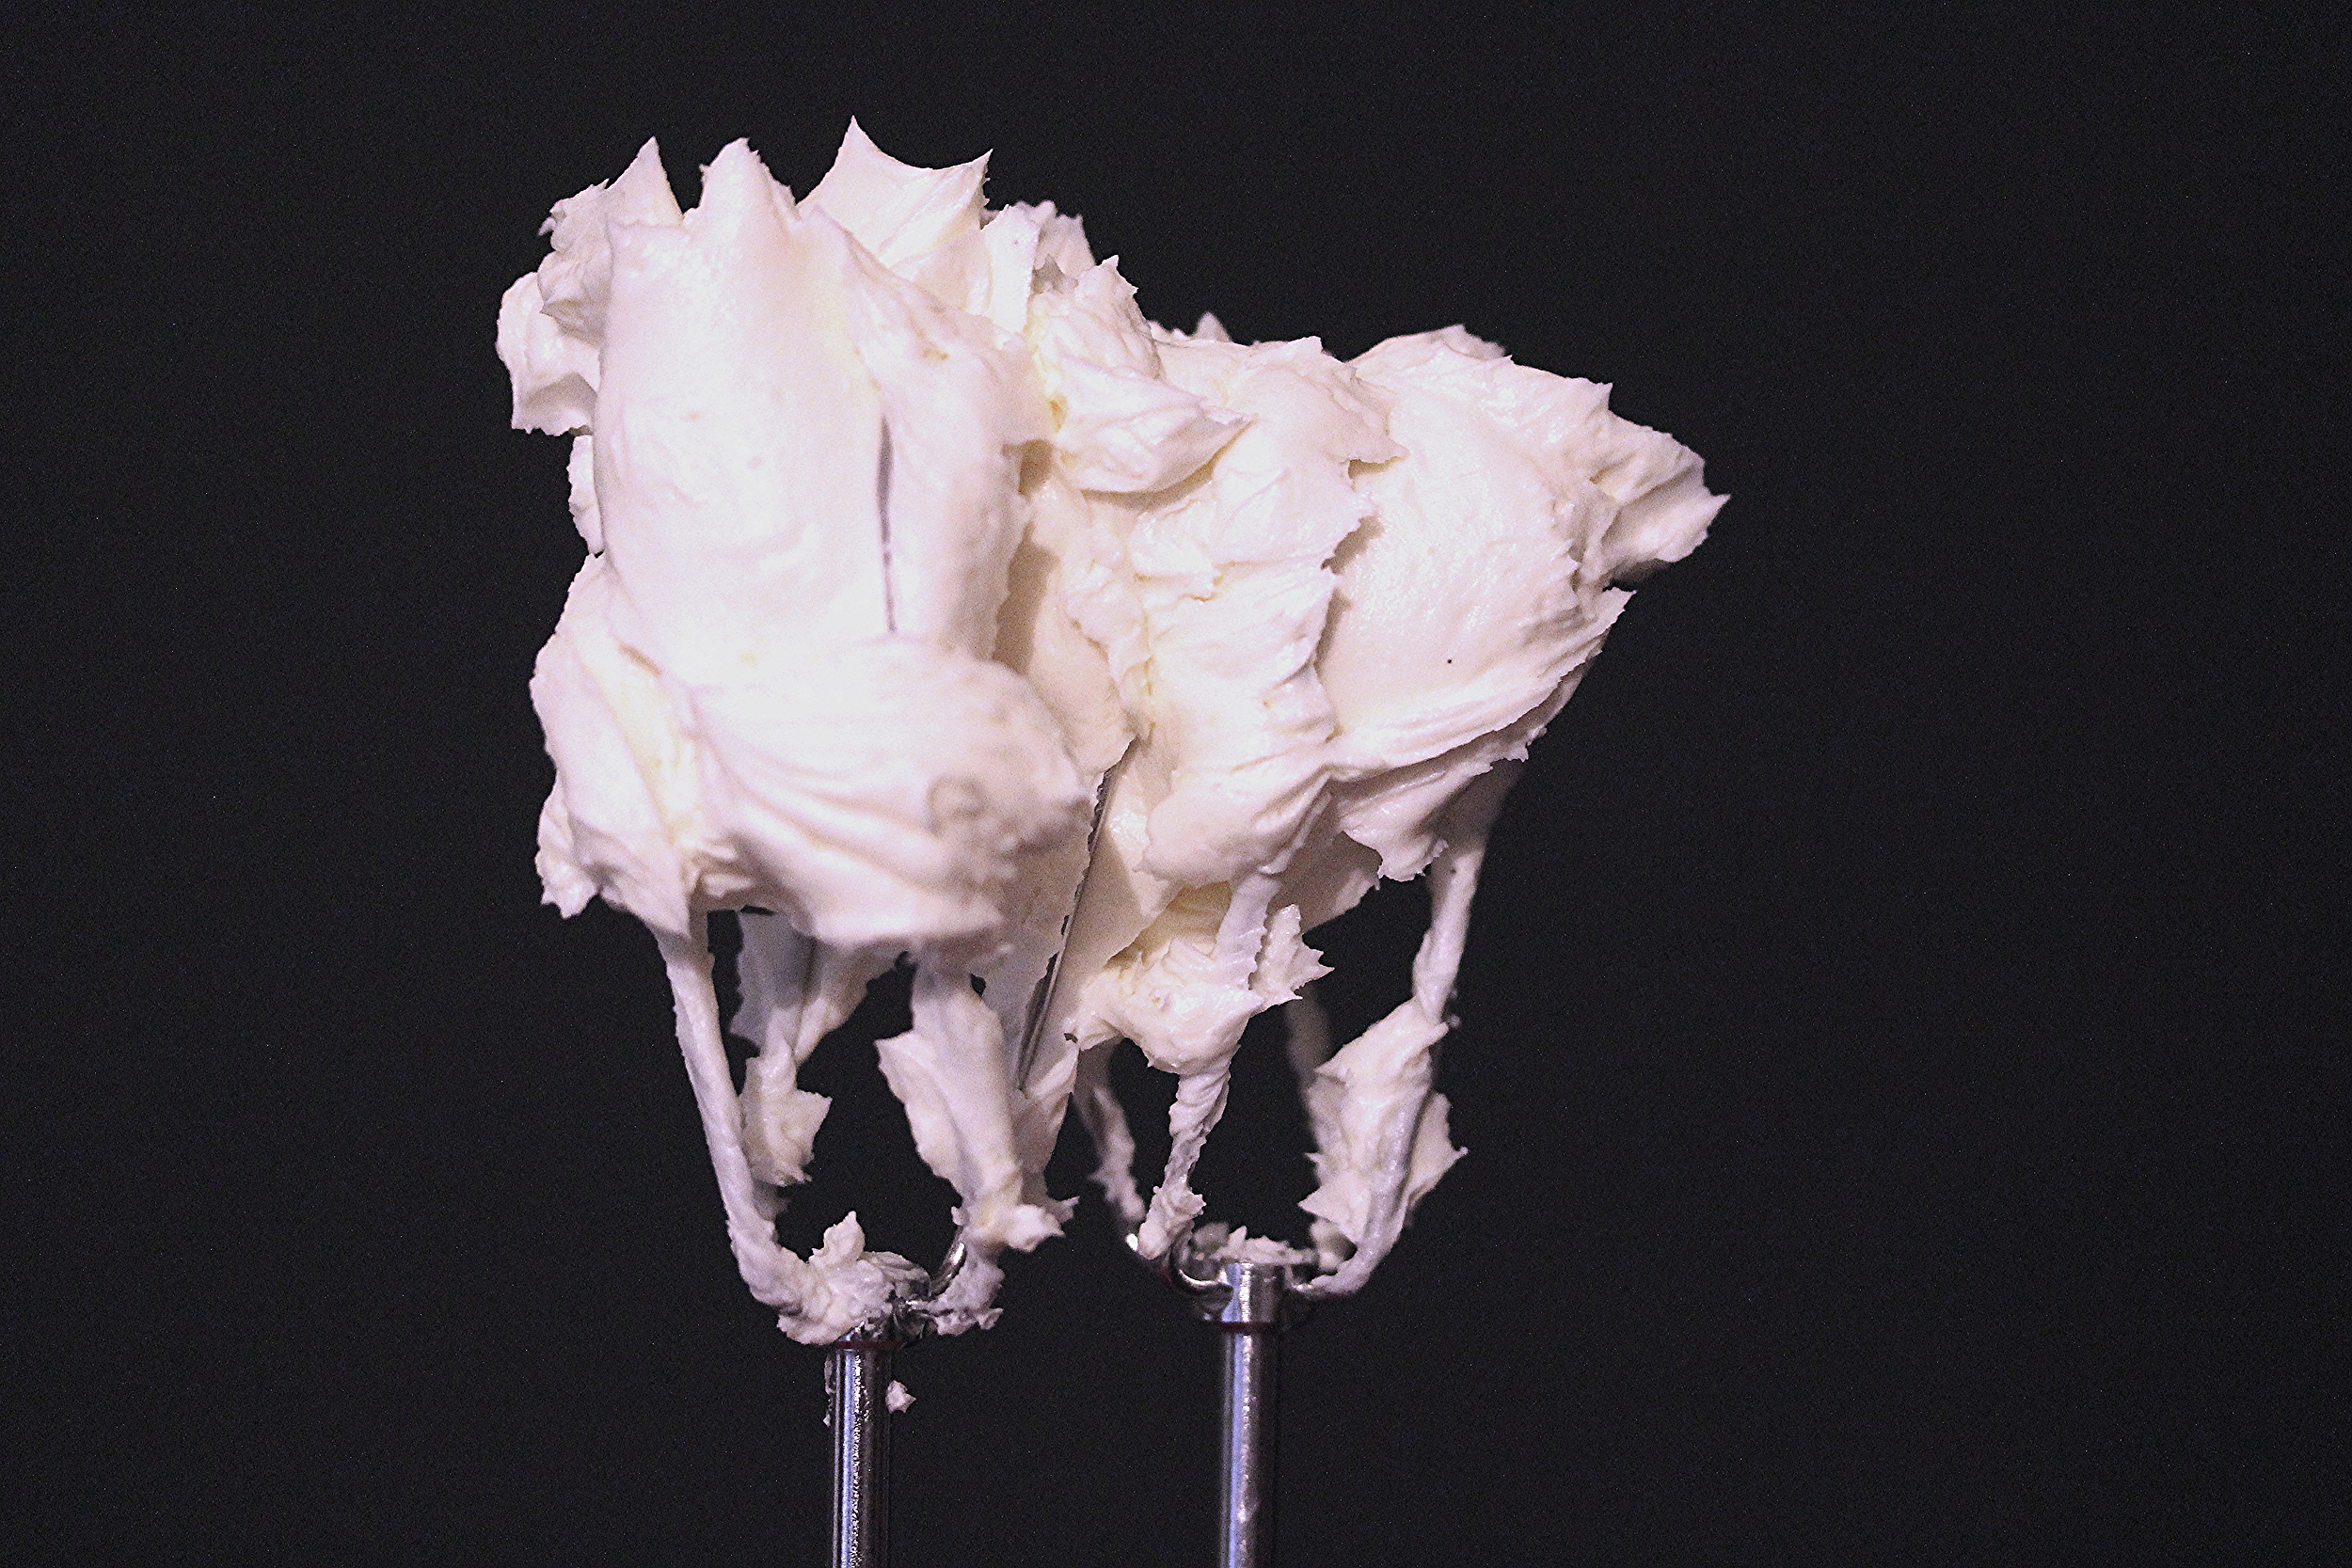
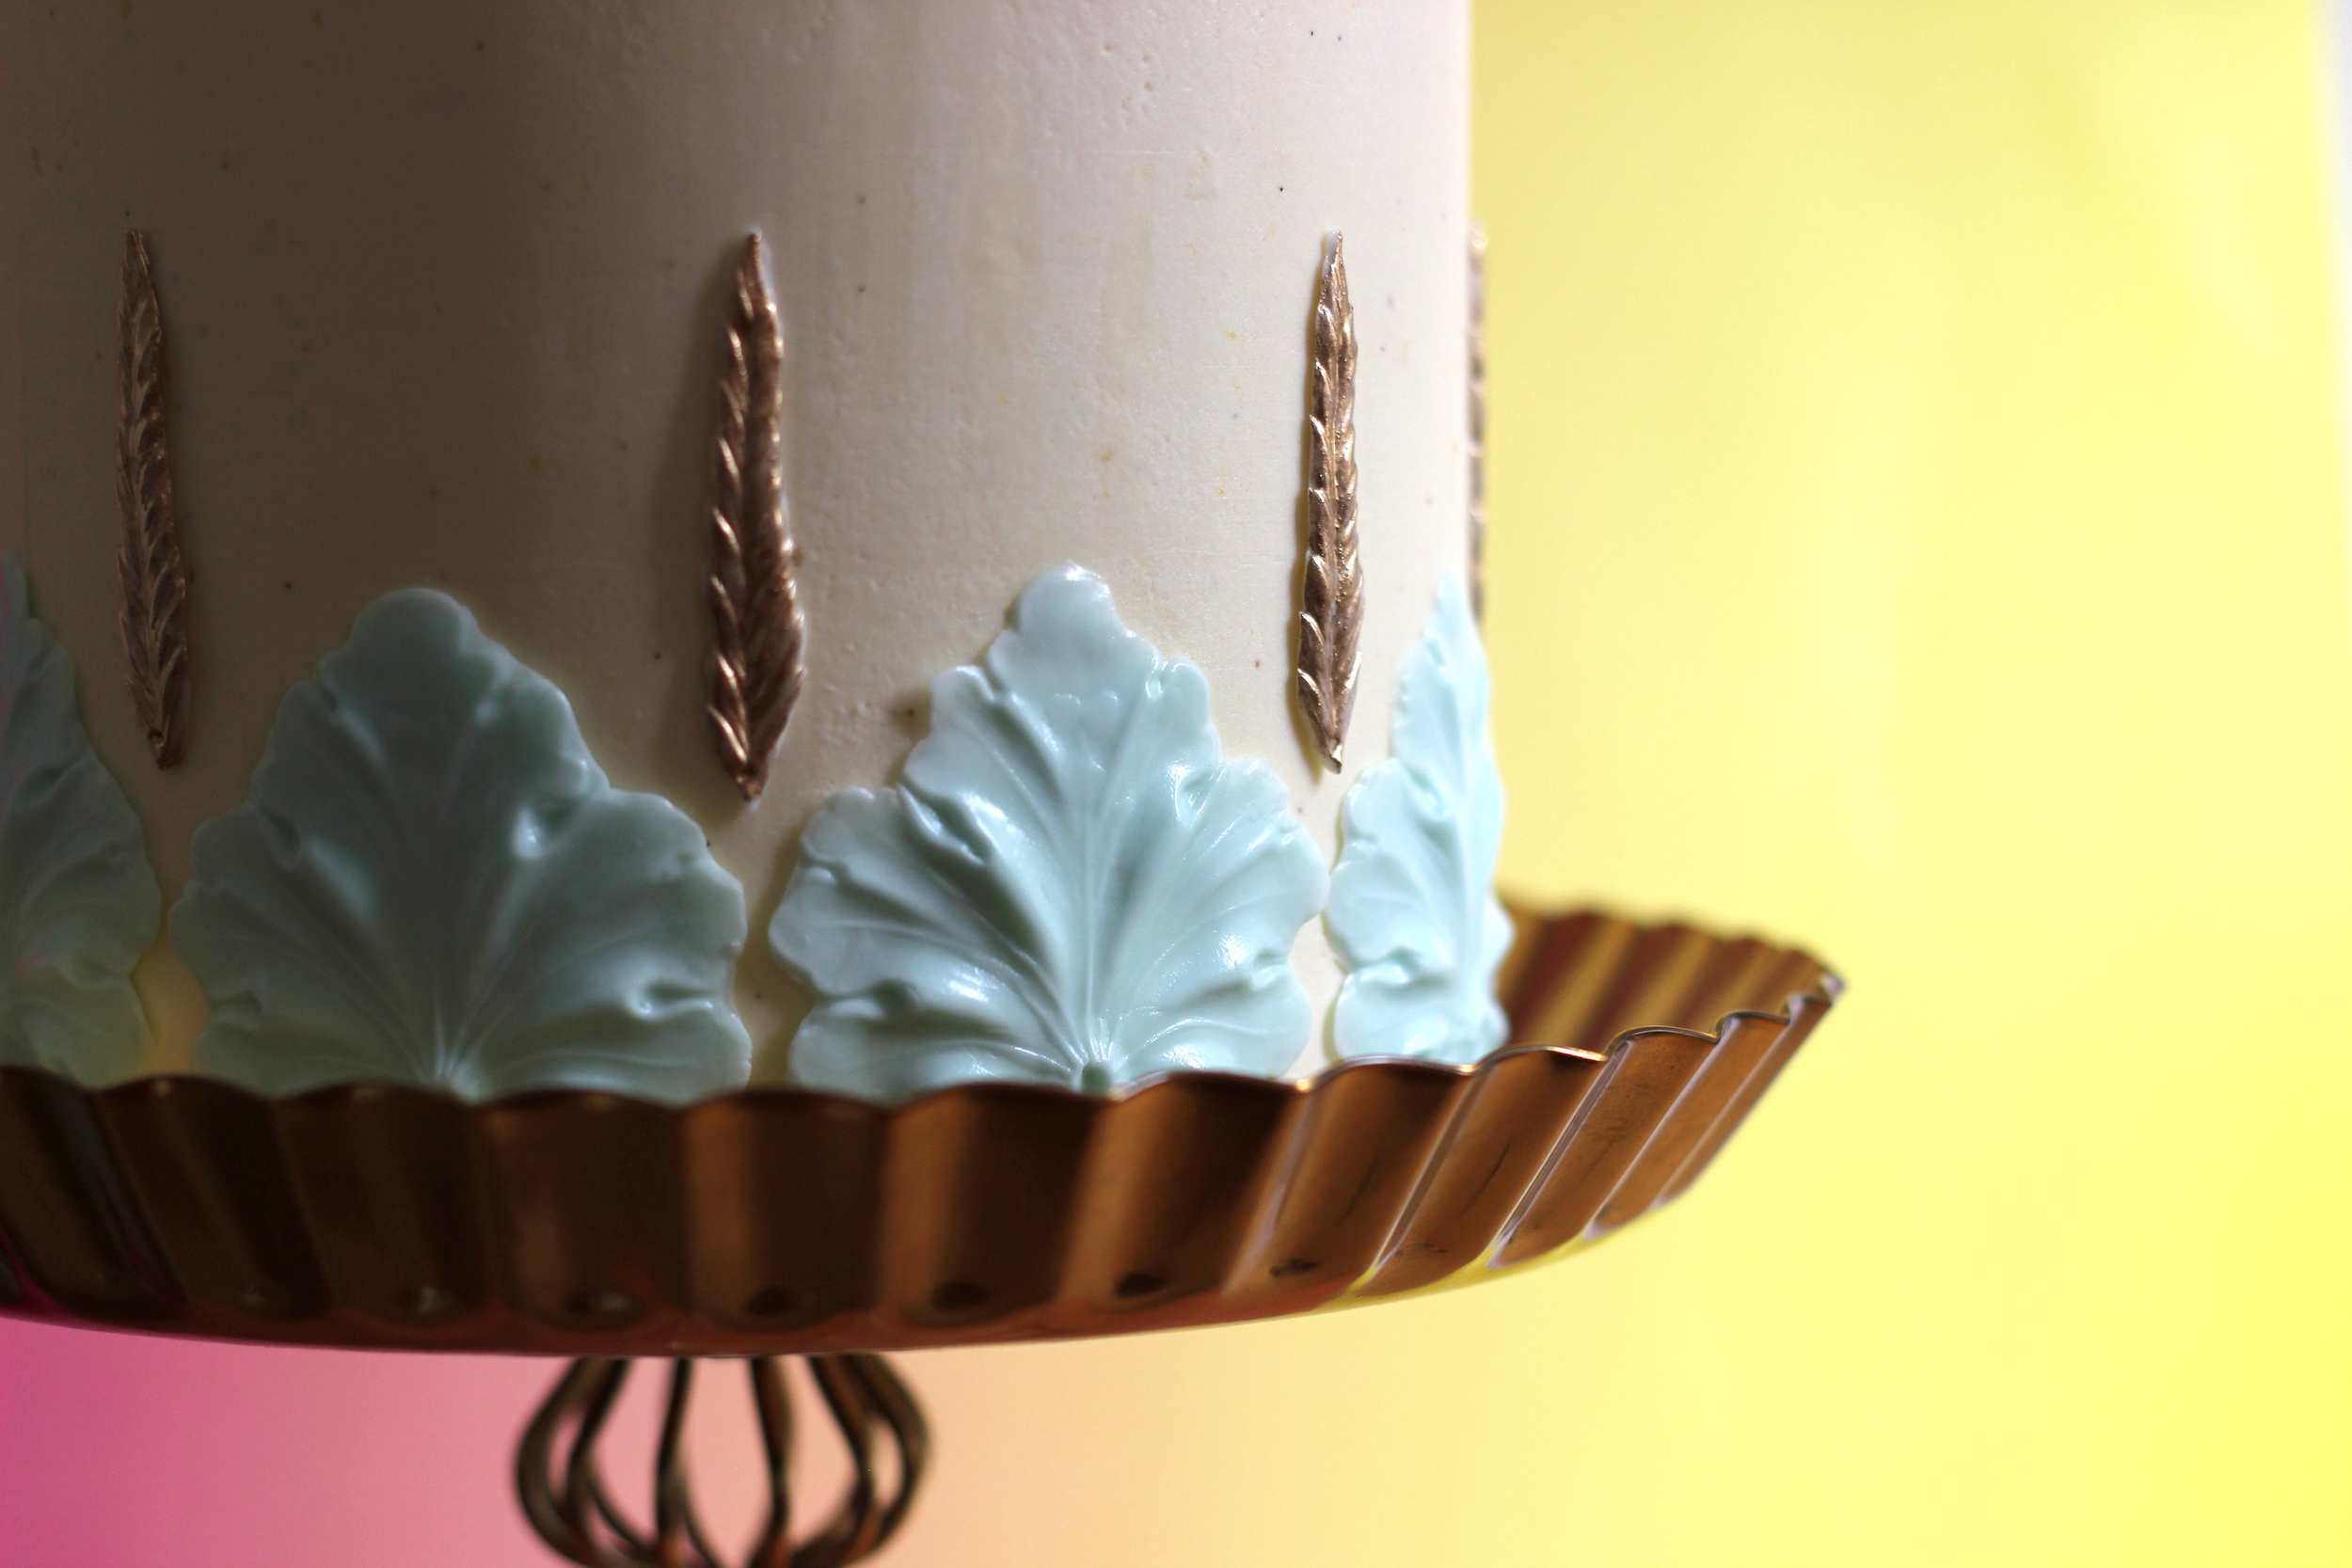
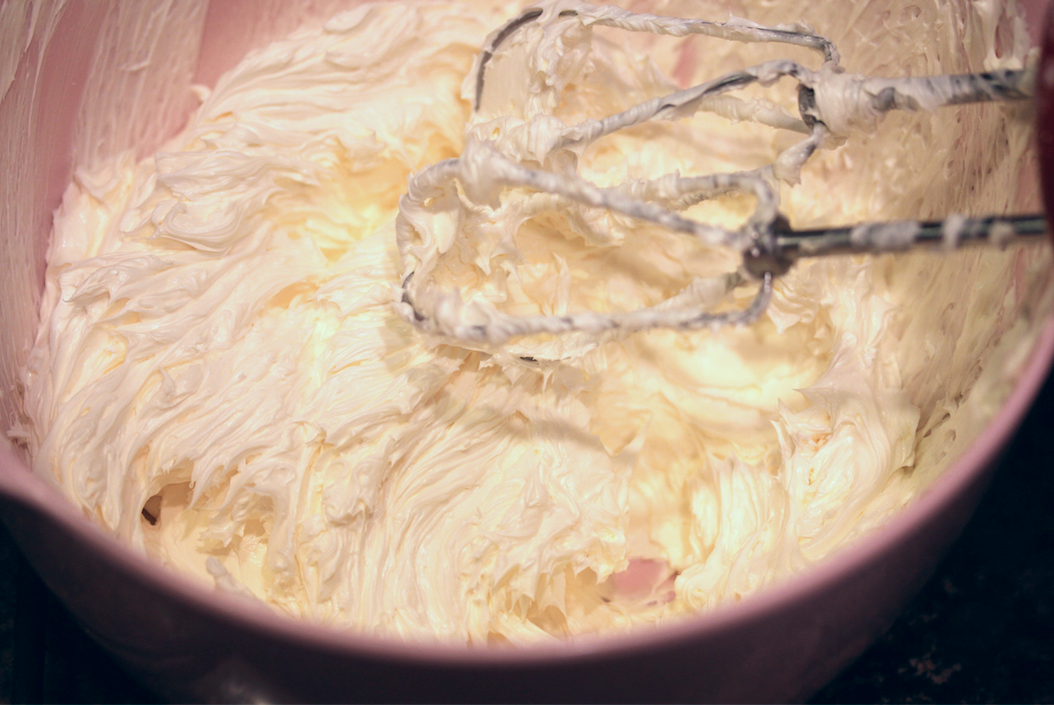
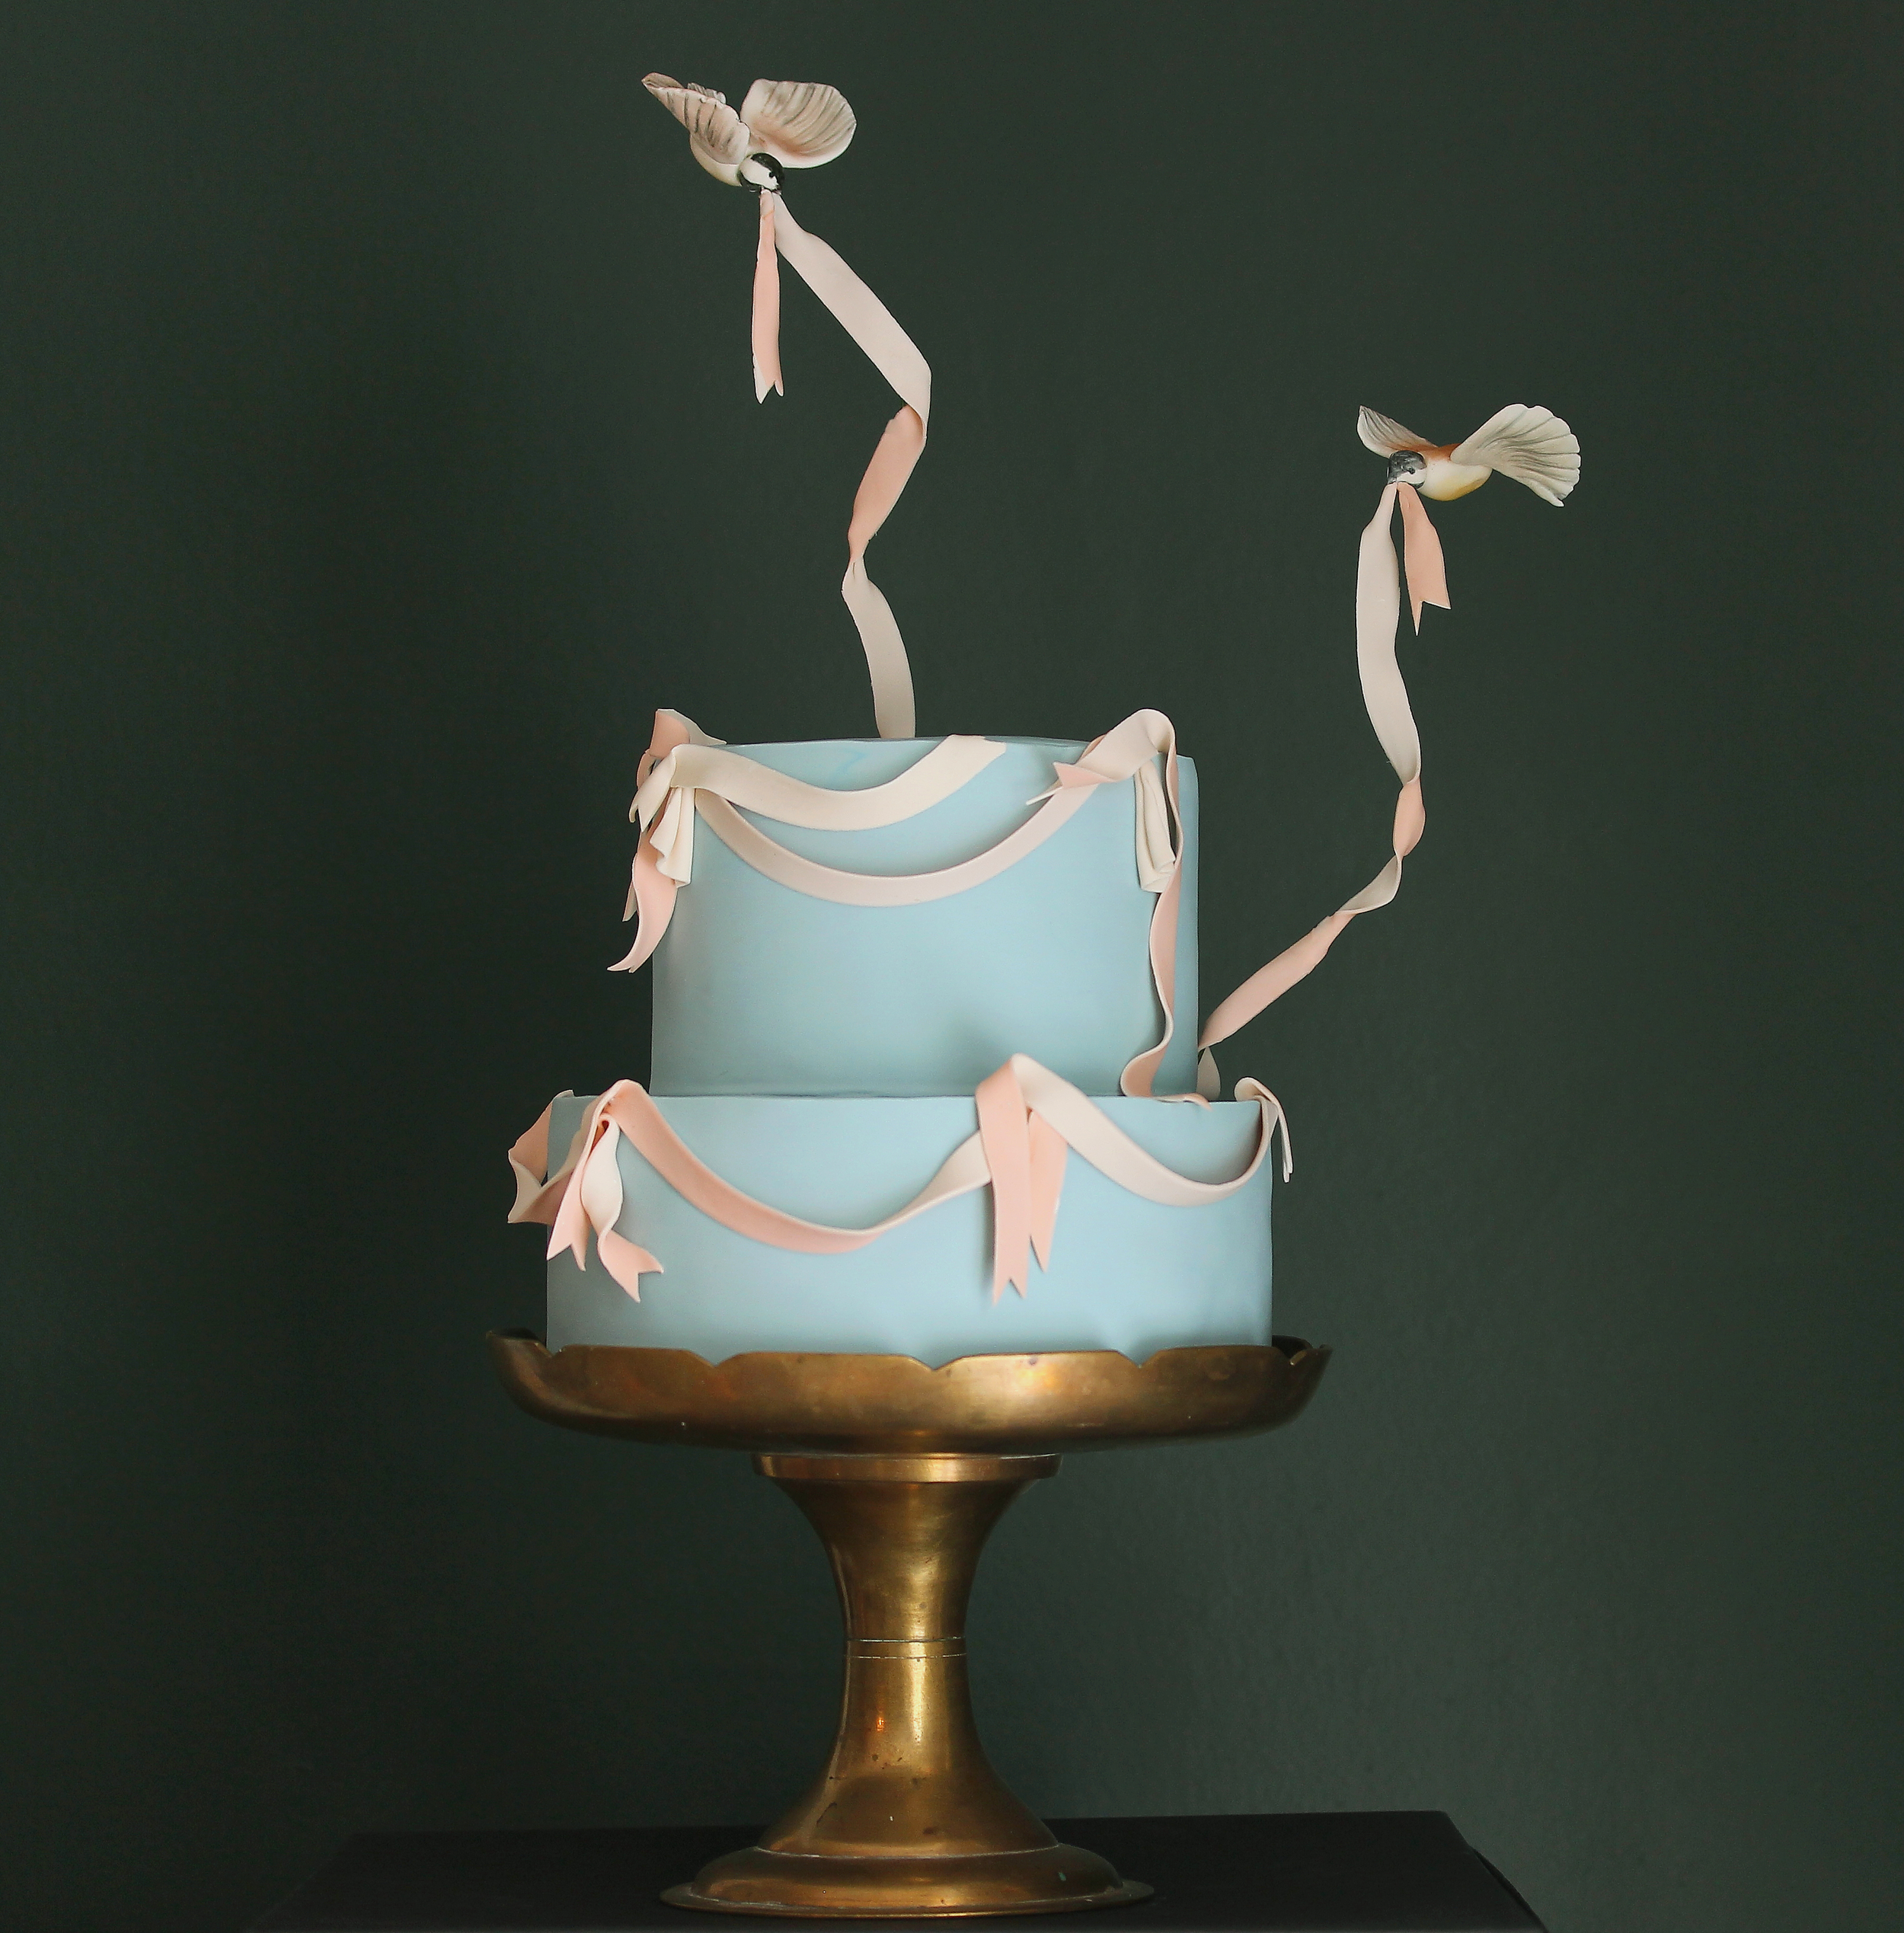
I frosted this cake with my version of 7-minute, or cooked flour, buttercream (post on this soon) and outfitted her in dusty blue fondant and an ombre swath of pink gumpaste spray roses. It's funny...I'm not a huge fan of roses, but somehow when they are made very small I suddenly love them. I guess it is a cuteness thing. The wafer paper leaves add light and transparency to the arrangement, although I'm still woking on a good system for getting the wires to stick to the leaves--it's much more annoying than gumpaste leaves!

Peach Buttermilk Cake

6 oz. all-purpose flour

6 oz. cake flour (White Lily)

1 Tbsp. corn starch

2 1/2 tsp. baking powder

1/4 tsp. baking soda

12 Tbsp. butter, softened

12 oz. sugar

1/3 c. vegetable oil

1 tsp. salt

1 Tbsp. vanilla extract

4 eggs, room temperature

1 1/2 c. buttermilk

2 c. finely diced fresh peaches (about 3)

Preheat oven to 350 degrees F.

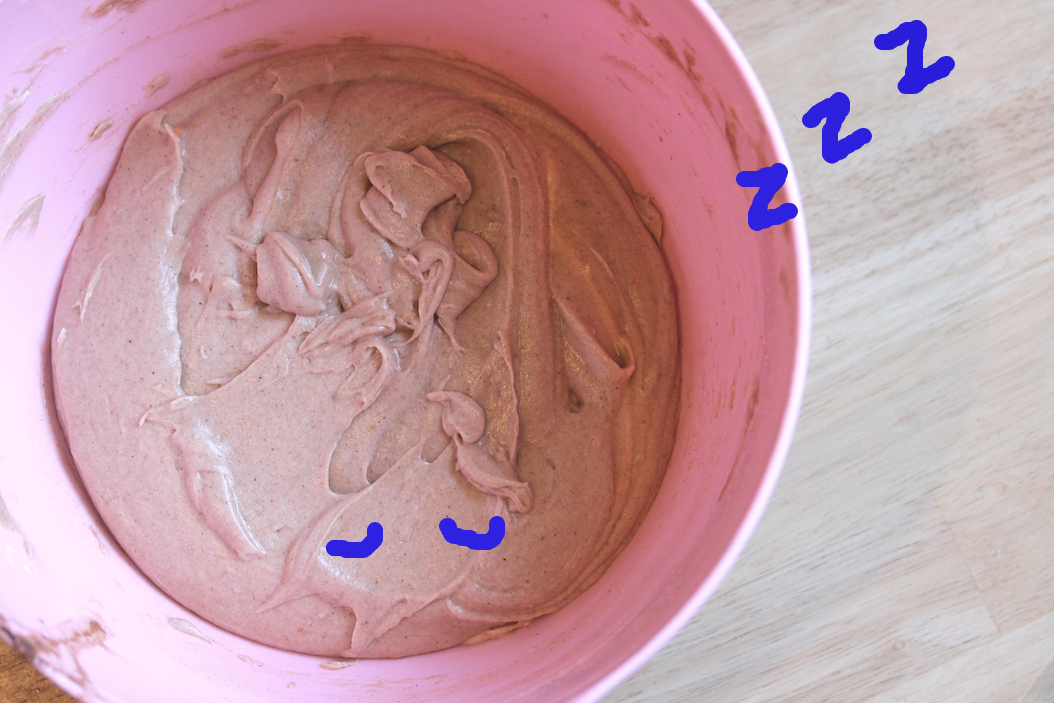
Mix or whisk dry ingredients thoroughly and set aside. Whip butter and sugar until light and fluffy, then add oil, vanilla extract, and salt and whip until combined. Add eggs, one at a time, and beat until uniform and fluffy. Sprinkle in 1/3 of the dry ingredients and mix until combined, then add the rest and mix until just combined. Mix in buttermilk until smooth. Fold in peaches.

Divide batter among two or three greased and floured 8" or 9" pans and gently smooth tops--do not tap pans to remove air bubbles. Bake for 30-40 minutes until centers are fully set and spring back when pressed--undercooking will result in a gummy texture. Allow to cool completely in the pan, then split, fill, and frost.

I dare you to come get this one, squirrel jerks

I dare you to come get this one, squirrel jerks


Perfect Chocolate Cake by Molly Brodak

Let me just get this out of the way right off the bat: I don't really like chocolate cake. It's always just a little wrong somehow--too dry, not chocolately enough (just, you know, chocolate-colored), too rich, too sweet, too something.

I needed to make my peace with chocolate cake.

There are so many kinds of chocolate cake out there. Americans prefer a sweet, soft, light cake--like the box mix. In fact, box mix seems to be the standard to which all homemade cakes are measured, strangely. It's a texture thing. American cakes have to be light and moist, which is tough for butter-happy homebakers (butter is a huge factor in why homemade cakes are often dry--more on this later).

Australian chocolate cake is mud cake--dense, rich, almost brownie-like to us. And in Europe, most chocolate cake is either a flourless torte or it's dry as a hard sponge--and why it's often soaked in liquor syrup or simply meant to be dunked in tea. There's a place for all of it.

I had a very specific set of criteria for the perfect chocolate cake: it has to be very flavorful, first of all, and it has to be moist but not dense. It has to have a fine, velvety crumb, with a soft but sturdy texture so it can be stacked, carved, and covered in heavy ganache and fondant. Most American chocolate cake recipes are great for cupcakes or sheetcake that does not get torted and carved--it has an open and squiggly crumb that is deliciously soft but terrible for tall, stacked cakes.

I normally trim my cakes but I didn't need to with this one

I normally trim my cakes but I didn't need to with this one

We're going to need cake flour for softness, a bit of sour cream, both cocoa powder and melted chocolate for the best flavor, and mostly oil instead of butter. Butter, while I love it to death, has a higher water content than oil (obviously) and also has those pesky solids--the whey--that harden the cake's sugar-fat-flour bonds. A thousand recipes later, balance was finally achieved.

The recipe starts with the melted-sugar method of which I am such a fan, and to the hot sugar the chocolate is added, so no extra melting step is required, conveniently. I decided to add the sour cream to the whipped cream that gets folded in and the end and it helped to keep the cake light and flavor-balanced.

This is not how most people make cake

This is not how most people make cake

The recipe is dairy and egg heavy, so swapping in some gluten-free flour is going to work just fine, but a non-dairy, egg-less version I believe would not be possible. You also have a good bit of sugar here, so make sure you are using unsweetened chocolate and not semi-sweet as a substitute. The espresso powder is optional but definitely boosts flavor, and I promise does not impart a coffee taste. 

the most velvety, moist crumb EVER

the most velvety, moist crumb EVER

Just to be sure I'd found tough-yet-tender perfection, I made an extra tall cake with custard buttercream and wrapped it in a heavy and dramatic molded fondant design.

Look at this piece! I made a silicone mold of a vintage wooden architectural detail I'd found in my mold-making madness that I knew would be absolutely killer on a cake. Typically fondant molds are little, fussy affairs, made from jewelry findings and meant to be arranged judiciously as appliques. This mold, on the other hand, makes the cake in one fell swoop.

I die

I die

This recipe makes a LOT of cake--about 9 cups of batter, so feel free to halve it if you are only making a small cake. It will fit four 9" pans generously, or--as I have done here with this cake--two 3" deep 6" pans and two regular 4" pans. I can't recommend enough to get yourself some deep cake pans rather than the standard piddly shallow ones. You'll save space in your oven, since more layers can come out of one pan, and they help prevent overcooking/dry cakes. Using a flower nail or heating core in the center of a deep pan will ensure your cakes cook evenly.

This cake takes a syrup soak really well, and I highly recommend it, since all chocolate cake is prone to drying due to the chocolate itself. Just make a simple syrup, add the flavoring or extract or liquor of your choice, and brush or squeeze on before icing.


Perfect Chocolate Cake

14.2 oz. cake flour (I use White Lily)

16 g. (about 4 tsp) aluminum-free baking powder 

1 oz. (about 1/2 c.) Dutched process cocoa powder (Hershey’s Special Dark or KAF Black Cocoa are great)

3/4 c. heavy cream

1/4 c. sour cream

21 oz. (about 3 c.) granulated sugar

2/3 c. water

2 tsp. instant espresso powder

4 oz. unsweetened chocolate, chopped finely

2/3 c. plus 3 Tbsp. canola oil

4 Tbsp. unsalted butter, softened to room temp

1 tsp. salt

1 Tbsp. vanilla extract

6 yolks, room temp

4 eggs, room temp

Preheat oven to 350 degrees and prepare pans. With a hand mixer, mix the flour, baking powder, and cocoa powder thoroughly, until no lumps remain (do not skip this step, it is especially important with cocoa and cake flour which both tend to clump). Rinse beaters and use to whip cream in a cold bowl to soft peaks, add sour cream and whip to firm peaks. Place whipped cream in the fridge. Chop chocolate finely.

In a saucepan, heat sugar, water, and espresso powder over medium heat until most of the sugar is dissolved. Stir frequently or use your hand mixer to speed up the process (be careful that the cord is kept away from the burner). Do not allow mix to boil. Once the sugar is mostly dissolved, pour into a large bowl and add chocolate, mixing until smooth. Add salt, vanilla, oil, and butter and mix until smooth. Sprinkle 1/3 of the flour mix into the wet ingredients and mix well on low, then gradually add the rest but do not overbeat. Set mixer aside and grab a spatula and whisk. At this point, the mixture should be warm but not too hot to touch--If your sugar mixture is still very hot, allow it to cool--you don't want to cook your eggs.

Add the yolks next, two at a time, mixing in by hand with whisk, then the eggs. Don't be tempted to reach for your electric mixer. Just be patient. They incorporate better if they are room temperature instead of cold from the fridge. Then gently fold whip cream into the mixture with a spatula until completely combined. Pour into prepared pans and tap them hard several times on the counter to release large air bubbles. Bake anywhere from 20--45 minutes depending on your pan sizes and depth. Cakes are done when their centers spring back, they no longer jiggle when moved, and the edges just begin to pull away from the sides. I don't recommend poking anything into your cakes to test doneness--just a quick press with your finger in the center will tell you all you need to know. Deep pans will also cause the tops to split (see my photo) which is another good indication of doneness. Cool, level, and split cakes, then soak with simple syrup and frost.

One Buttercream to Rule Them All by Molly Brodak

It tastes like ice cream because it is ice cream, essentially. Custard to be exact. Just, not frozen.

This recipe is years in the making. I have tried every buttercream in every variation under the sun, searching for one that would be creamy, smooth, not too sweet, and yet sturdy enough to hold up under stacked cakes. Generally I give up on all the frostings and just make ganache.

Let's get to the heart of things. Bear with me--we need talk for a minute about the components of frosting--the very concept of frosting--in order to get at what we even want it to do. Along the way we'll run through the popular buttercreams and their issues.

We ask so much of frosting. Sealing in the cake's freshness and looking perfectly beautiful, It's supposed to be sweeter than the cake it frosts, but not sickly sweet. It's supposed to be both smooth and creamy yet fluffy. It's supposed to hold up under heavy stacked cakes, hold up in hot weather, hold up with all the dyes and flavors we add to it, hold up under heavy fondant and ganache, hold up to piping, freezing, defrosting, re-whipping, etc. etc. AND it has to be DELICIOUS. No wonder there are a million variations on a million recipes for the stuff--to accomplish all of these demands is no simple task for what is essentially a mere embellishment on a cake.

And so what is the theory, if you will, of its composition? We've got sugar for sure--either melted granulated sugar in a syrup, or powdered sugar (or both). The real debate, as you can see played out in the following paragraphs, is what body is best to transport this sugar to your palate. It's got to have a pleasingly fatty mouthfeel, a smooth and substantial texture, but not too heavy.

oh oh

oh oh

The first candidate is butter, obviously, hence the simple beauty of American buttercream. Whipped butter can for sure be fantastically fluffy, and the fattiness is perfect. But American buttercream is too sweet, and if you try to make it less sweet by leaving out some powdered sugar, it just tastes like solid butter. It's fine in a pinch, but not transcendent. Can be delicious if you add as much unsweetened chocolate to it as possible.

I'm not even going to mention the shortening version of American "butter"cream. Because, gross. The war is over my love, put the Crisco down.

How about something lighter, a little meringue? Swiss meringue buttercream (SMBC), the second most popular frosting, always bugged the everloving crap out of me. First of all, it's nonsensical to make a meringue and then completely deflate it by cramming a brick of butter into it. At least one person has realized that the entire meringue step is completely unnecessary. Nailing the emulsion between butter and sweetened egg whites is tricky because of the temperature difference--which is why there is almost always some form of encouragement in any SMBC recipe along the lines "when it turns to soup, don't worry, just keep whipping and it will come together!" If you haven't figured it out already, that "soup" is the remnant of the meringue you just spent all that time whipping up, which has now had 99% of its tiny bubbles popped. By hunks of butter. You might as well just pour sweetened egg whites into your butter from the get-go. Beyond that weirdness, it's delicate, prone to weeping, and has a creepy texture. Yes, creepy. It's too slick.

Italian meringue buttercream is somewhat better, since the egg whites are not cooked, cooled, then whipped up, but whipped first then stabilized with hot sugar. Still, it's a tricky meringue to perfect because of how you have to, you know, pour hot sugar into meringue and somehow not murder it. Also the subtle shine of this frosting puts me off, as if it contains gelatin.

The other half of eggs? French buttercream, with an egg yolk foam instead of an egg white meringue...well...nobody makes that one. It's good though, just very soft and yolky.

Pudding? German buttercream and cooked (flour) frostings...now we are getting somewhere. I've been fixated on these in the past six months, feeling like there is something perfect here if I can just get the ratios right. I love the full body of cooked flour (or seven-minute, or ermine, (such a great name!)) frosting, but the texture wasn't fluffy enough for me--it came out a little on the pasty side, and dull in flavor as glue unless a ton of sugar is added. It was the flour.

So, scratch the flour. That means there is one champion left on our list, the one who ultimately took the prize in every possible way: custard. About 40% custard to 60% whipped butter makes the perfect body for the perfect frosting.

We circle back to German buttercream. It's not a popular one because it's considered too soft to hold up to piping, and can have a yellowish tinge. 

Well. I am here to say I have solved all of these problems. I have solved buttercream, period, haha!

Light, delicious, AND obedient!

Light, delicious, AND obedient!

For now.

First off all, I saw several problems with the custard recipes in German buttercream. They were all made with yolks only and milk as the custard base. Obviously adding a whole egg or two is going to give us more lightness to balance out the heavy body and flavor of yolks. Swap some milk for heavy cream to add non-egg density and a lighter color. Thirdly, we are going to need two sugars here--granulated (for the custard) and powdered (to add to the butter). A balance of both means the perfect amount of sweetness/stability to the custard base and firmness for piping. And lastly--that utterly foolish last step in all recipes of adding small amounts of soft butter to the custard as you whip it--reverse that! Whip up your butter first to ultimate fluffiness, then add small amounts of custard. Duh. Now we have a frosting that is ridiculously perfect--light, fluffy, yet firm enough to pipe beautifully, not too sweet, perfectly rich (and because of the extra fat from the yolks and cream) carries flavors potently!

This is somewhat embarrassing to admit but I teared up a little the first time I tasted this recipe. You don't understand how long I have been dreaming of this frosting.

gasp

gasp

It doesn't break, it doesn't weep, it can easily be adjusted to your sweetness preference. Does it crust? No. But it's firm enough to cover with fondant anyway if you use the barrel wrap technique, which is what I almost always use (post on this soon!). 

Making the custard for this recipe will remind you of making pastry cream, except with cornstarch only and without the butter stirred in at the end. It will cool very firm, like unpleasant jiggly concrete, but that's ok, you don't want a lot of moisture in your buttercream or it will be too soft.

This frosting has an uncannily light texture while tasting rich and substantial. The flavor of fresh cream really shines here, which is why it reminds me so much of ice cream. And because you are heating the custard, it's a great application for flavor infusions, such as a split vanilla bean pod--or, where you can add your chocolate if making a chocolate version for seamless incorporation.

Onto it then. Yes it takes a bit of prep since you need your custard to cool completely before you can make your frosting, but I highly recommend doubling the custard part and keeping it on hand anytime you need to whip up some frosting--and, I don't really see a problem with having extra pastry cream on hand. It will last about three weeks in the fridge tightly sealed, and can be frozen for six months. 

Now, about that cake...this cake is ALSO something years in the making. A velvety, dense-crumbed, moist chocolate cake that is not even remotely heavy or dry, yet can be carved and stacked? Yes'm. But that recipe is for another post.

hello my love

hello my love

The fondant leaves and slim gold feathers I used to adorn this cake come from molds I sell on my Etsy shop from vintage pieces I have fiendishly collected over the years, if you wanted to know.

Custard Buttercream

aka the world's best buttercream

This recipe makes A LOT of buttercream--about 7 cups (enough to fill and frost two 8" cakes and then some). If you don't need that much right now, I recommend making the full custard amount, then freezing half of it for later use. Whip up your half-sized custard portion with half of the amount of butter and powdered sugar here.

8 oz. granulated sugar

1.5 oz. corn starch 

1 egg

2 yolks

1 c. whole milk

1 c. heavy cream

2 Tbsp vanilla extract

1 c. (two sticks) of salted butter

3 c. (six sticks) of unsalted butter

2 1/2 c. powdered sugar, or to taste

Whisk granulated sugar and cornstarch in a heat-proof bowl until well combined, then add egg and yolks and beat for 1 minute. Heat milk and cream on the stovetop until mixture starts to steam but not boil. Temper the egg mixture by mixing in a small amount of hot milk to eggs, gradually adding more until mixture is smooth, then pour contents back into the saucepan and cook for another minute, until the custard thickens and bubbles swampily. Remove from heat and strain custard through a fine sieve to catch any cooked egg bits. Mix in vanilla, press plastic wrap over the surface, and allow to cool in the fridge for at least 3 hours.

If the custard was cooled overnight or for longer than 3 hours, remove from fridge and allow to come to room temperature before using. Custard should be cool room temperature--not cold.

Whip butter until pale and fluffy, about 4-5 minutes. Add powdered sugar and whip for at least 1 more minute. Add spoonfuls of cooled custard to the butter and whip until completely combined. 

crying again now

crying again now

Bird Day Cake + Vanilla Malt Syrup Recipe by Molly Brodak

On the top of the list of the things I cannot handle right now is my birthday cake today. Happy birthday to me! Who hasn't wished for a couple of magic chickadees to help with one's cake decorating?

I mean.

I mean.

The little chickadees are hand painted gumpaste and suspended with a hidden wire behind the dual tone gumpaste ribbons they hold.

Under the dusty blue fondant is insanely good vanilla malt cake and a fudgy chocolate buttercream, my favorite combination.

I've been working on a good vanilla malt cake for a while and I've finally perfected my recipe with this cake. Simply adding malt powder to the mix didn't work--not only did the malt powder tend to clump up, but the malt made the cake drier with a darker crust (as malt encourages browning). So if you can't bake it in the cake, there's only one other logical choice--a soak!

I don't always soak my cakes in syrup because I really love my basic cake recipe and I usually don't think it needs to be any sweeter or moister. But this soak is so, so worth it.

Below is the recipe for the vanilla malt syrup I used to soak this cake, which made enough for both the 6" and the 8" layer. If you've never used a syrup soak on your cakes, don't be shy with this stuff. It might look at first like the cake layer is just getting soggy but it give it a few minutes and the cake will absorb all the syrup and become fantastically moist and delicious. I dab it on with a silicone brush, but another good way to apply it is with a squeeze bottle.

So this is another good use for the dark malt powder I'm sure you bought to make the Salty Malty cookies--the recipe for which, by the way, is going away soon, so be sure to purchase it before the next Recipe of the Month comes along (and I hear it's going to be a recipe for the cheesecake to end all cheesecakes...) This syrup is exactly what you need to make malted milkshakes, so it's great to have on hand.

Vanilla Malt Syrup

1 c. water

1 c. sugar

1/4 c. dark malt extract powder

1 tsp. vanilla extract or 1/2 vanilla bean pod

pinch salt

Heat water and sugar in a saucepan over medium heat or in the microwave until the sugar is dissolved. If using, add 1/2 vanilla bean pod and allow to simmer for a few minutes. Add the malt powder and stir until it is completely dissolved. Cool, and add vanilla extract. Store in the refrigerator once cooled.

I truly cannot even

I truly cannot even

I died

I died

White Chocolate Chai Cake by Molly Brodak

There you are, wanting cake immediately, but knowing your damn butter is definitely not soft enough. You just aren't clever enough to have prepared a day in advance for this specific craving to hit, and now you are standing in the kitchen wondering if you can just microwave that butter a bit to soften it (nope) or cram a few sticks in the pockets of your sweatpants for a while (oh I do this all the time). Stop doing this. There is another way.

I'm a huge fan of Shirley Corriher's "melted sugar" method of cake baking which turns the traditional creaming method on its head. I still make the occasional creamed-butter cake, like with my Super Buttermilk cake (coming soon), but this little-known method has become my standard. The cake it produces is exceptionally tender and moist with a very fine and even crumb. Like velvet.

Instead of relying on a fickle network of puffed air in your sugar-butter-egg emulsion plus an extra tenderizer like buttermilk, this method uses a touch more baking powder than average and one of my all-time favorite ingredients--whipped cream. The other significant difference here is using a mix of oil and butter and a dense simple syrup added to the fats. Hence, you don't need to wait for your butter to soften.

Recently, while adding the water to the sugar for the simple syrup, I thought well this could be tasty instead of plain, this plain water I am adding here, and so the Chai Cake was born.

I absolutely love tea. I wanted to make sure the cake had the distinctive flavor of black tea unlike some chai cake recipes which are really just spice cakes. With a foundation of the milky flavor of the whipped cream and the extra-strong tea, this cake tastes exactly like chai.

I used The Republic of Tea's Republic Chai teabags for this, since their tea is both easy to find and high quality. Any brand of tea will work, but using a decent quality will ensure the tea flavor is rich and the spice blend is well designed.

delicious AND easy: the one and only white chocolate ganache

I iced the cake with a simple white chocolate ganache to keep the chai flavor in the forefront, although a basic vanilla buttercream would also be delicious.

I like to bake my cakes tall and small. Two 6" cake pans will give you a more moist cake than two 9" cake pans if you ask me. My favorite pans are Fat Daddio's in the 3" depth rather than the standard 2" so I can make more layers at once and save space in my oven. With the deeper pans, I've found that using a heating core/flower nail ensures the middle is never left undercooked. Here's my set up:

heating core, parchment round, 3" depth--just missing grease and flour

Did you see that killer cake stand in the top photo? I scour eBay for vintage cake stands/pedestals on a regular basis and although I knew I might not use such an intense cake stand very often, I had to have it. Slightly terrifying but mostly great. I thought a simple architectural fondant wrap would suit the overall snakeyness of the stand (which, I know, is really a pillar candle holder and not actually a cake stand at all).

fondant arcade with scalloped arches completely optional

And there's that whole matter of the edible wafer paper lotus I created for this cake. Gumpaste is my central medium for edible flowers, but I am branching off into wafer paper lately and will post about it soon. Because it curls so well on the edges, a flower with a deeply cupped petal like a lotus is the perfect match for wafer paper.

So between the flower and the ganache and the decoration and the cake itself, I would say this cake is an edible manifestation of one entire Sunday of my life. I'm not complaining. Baking is funny like that. It's very tiring in one way but also energizing and relaxing. Maybe it wouldn't be, though, if I didn't love it so much. And I don't know what I would do without music in the kitchen to keep me focused and happy. No matter what else I try, Inevitably I return to Chris's monthly mixes at Gorilla vs. Bear. They are free to download and, once mashed together, provide an epic non-stop playlist of interesting music without interruption. Thanks, Chris, for making these, they've become somewhat indispensable to my process.

I don't know why but Nov 14 is my favorite one

I don't know why but Nov 14 is my favorite one

White Chocolate Chai Cake

1/2 c. (118 ml) heavy whipping cream

1 3/4 c. (201 g) cake flour (do not sub AP flour)

1 1/4 teaspoon (8 g) baking powder (aluminum-free is best)

1 tsp (2.5 g) cinnamon

1/2 tsp (1 g) cardamom

pinch of ground cloves

1 1/2 c. (298 g) sugar 

1/3 c. (80 ml) strong brewed black chai tea

3 Tablespoons unsalted butter, cut into cubes

1/3 c. + 2 Tablespoons (107 ml) canola oil 

1 teaspoon (5 ml) vanilla extract

1/2 (3 g) teaspoon salt

3 large egg yolks, room temperature

2 large eggs, room temperature

For the ganache: 21 oz (600 g) of chopped white chocolate or good quality white chocolate chips and 6.75 fl oz (200 ml) heavy whipping cream

Preheat oven to 350 degrees F. Remove butter from fridge and cut into pieces, place eggs in bowl of warm water to bring to correct temperature if cold. Grease and flour cake pans, line bottom of pans with parchment paper. Whip the cream in a small bowl to stiff peaks, cover, and place in fridge.

To make the tea, steep 4 chai teabags in 1 cup of boiled water for five minutes. Do not over-steep or the tea will become bitter. Add sugar to a small saucepan and then add 1/3 c. of the strong tea. Heat sugar mixture over medium heat, stirring constantly, until sugar is mostly dissolved into a thick syrup. The sugar will not completely dissolve because the mixture is oversaturated. Scrape syrup out of saucepan into large bowl and allow to cool for a few minutes.

Add the butter, oil, vanilla and salt to the sugar syrup and beat until smooth. Sprinkle in 1/3 of the flour mixture and mix until just combined, then add the rest of the dry ingredients gradually until incorporated.  With a whisk, mix in the yolks by hand, then the eggs. Careful to not over mix. Fold in whipped cream gently, then divide batter into prepared pans and drop pans a few times onto your counter to knock any large air bubbles up and out of the batter.

Bake for 18-25 minutes, depending on your pan size. Cakes are done when the center springs back when pressed. The cakes should just begin pulling away from the sides as you take them out of the oven.

To make the ganache, heat heavy cream in a saucepan or microwave until it bubbles around the edges. Pour over the chopped white chocolate and let rest for 1 minute. Mix until smooth. Allow to set up for at least 30 minutes before using. If it becomes too hard after resting, microwave briefly until soft enough to work with.

Cool, level and split cakes, then fill and frost with ganache.

tastes like happiness


Glazed Orange Cinnamon Madeleines by Molly Brodak

Madeleines seem like a good place to start. Both a cake and a cookie, they satisfy on all counts. And these delicate Orange Cinnamon beauties are the most tender, melt-in-your mouth madeleines you will ever taste.

Yes bring me this tray


And at once the vicissitudes of life had become indifferent to me, its disasters innocuous, its brevity illusory...

writes Proust in that famous bit of In Search of Lost Time reflecting on the power sensory objects have to flood us with vivid memories. While I have no specific Sunday mornings at Combray to relive, I certainly can relate to the part about the vicissitudes of life becoming indifferent to me when I bite into a perfect madeleine.

Made with cake flour instead of all-purpose, these skirt the debate between the no-baking-powder-purists and those who prioritize the authentic underside bump via some very non-authentic baking powder altogether by adding a different ingredient for lift: whipped cream. The whipped cream also adds a rich, milky tenderness that is simply transcendent.

(For my treatise on whipped cream--one of my favorite things in the world--see this post over at Real Pants.)

There are a million varieties of madeleines, but for my money the warmth of cinnamon underneath fragrant fresh orange in both the cookie and the glaze cannot be beat. You can omit the glaze if you prefer your madeleines slightly less good.

Side note: Alain de Botton? Are you listening? I love you. Your Proust book is too great. Readers, if Proust is really all too much for you, at least read this by de Botton.

Ok. Onto it then. By the way, you don't really need a madeleine pan here, you can make these in muffin tin bottoms if you want to. But if you are going to buy a madeleine pan, buy two, since cleaning then re-buttering and re-flouring your pan after the first batch is a pain in the...underside bump.

Orange Cinnamon Madeleines

makes about 24

3 large eggs, room temperature

2/3 c. (130 g.) sugar

1/4 tsp. salt

1 1/2 c. (170 g.) cake flour (I use White Lily)

1 Tablespoon cinnamon

9 Tablespoons butter, melted and cooled to room temperature

zest of one large orange

1 teaspoon vanilla

1/3 c. (2.7 fl. oz.) heavy whipping cream

for the glaze: 3/4 c. (150 g.) powdered sugar + 3 Tablespoons of strained juice from orange

Grease and flour madeleine pans thoroughly and place them in the freezer. Melt butter in the microwave or on the stovetop and set aside to cool. Whip cream in a small bowl with a hand mixer or with a whisk to stiff peaks, cover, and place in fridge (whipping such a small amount of heavy cream can be awkward, just tilt the bowl and scrape with a spatula occasionally to maintain consistency). Sift flour and cinnamon together into a small bowl. 

In a large bowl with a hand mixer or in a stand mixer, beat eggs, sugar and salt until thick and frothy, about 6 minutes. Gradually add the flour mixture, gently folding with a spatula as you add it. Add the orange zest and vanilla to the butter and dribble in the butter mixture gradually, folding carefully until it is incorporated. Fold in the whipped cream until no streaks remain. Resist the urge to mix it; be patient with your folding and remember you are trying to preserve the delicate air bubbles in the whipped cream. Cover batter and let rest in the refrigerator for at least one hour (can rest for up to 24 hours). 

Preheat oven to 425 degrees F. Mix together glaze ingredients and set aside. Fill the molds with batter to about 3/4 full; do not spread or press the batter into the pan. A 1" ice cream scoop works well for this. Bake for 8-9 minutes, or until the centers are set. Loosen from molds by gently shaking pan. Allow to rest on a wire rack for a few minutes until just cool enough to handle, then dip each side of each madeleine in the glaze.

Glazed madeleines are best eaten the same day, but can be stored uncovered for several days. Unglazed madeleines can be stored sealed in an airtight container for two weeks, or frozen for up to three months. 

I accept your offer